
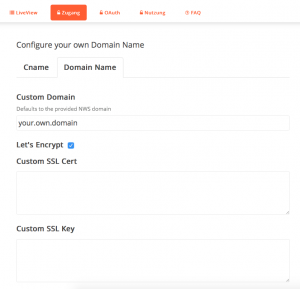
Since last week our Gitlab-ce and Gitlab-ee instances are able to use Let’s Encrypt for SSL encryption. As an owner of one of our instances, you are able to use Let’s Encrypt simply by activating it in your product view on our NWS platform.
With this, you can now use your own domain, without the need of an existing SSL-certificate. If you already have a SSL-certificate active and want to test Let’s Encrypt, you can do so. Your active certificate will be stored and will be activated again, as soon as you deactivate the SSL encryption with Let’s Encrypt.
In the screenshot below, you can see an example of how it looks in the product view. Activation and deactivation will always require a restart of your instances, since these are major configurations changes to your container.
If you are interested in one of our instances, just have a look on nws.netways.de! We have many more open-source apps available, such as Rocket.Chat, RT or Nextcloud and are currently working on some new features/apps.
NETWAYS Blog
Obstacles when setting up Mesos/Marathon
Sebastian has already mentioned Mesos some time ago, now it’s time to have a more practical look into this framework.
We’re currently running our NWS Platform under Mesos/Marathon and are quite happy with it. Sebastians talk at last years OSDC can give you a deeper insight into our setup. We started migrating our internal coreos/etcd/fleetctl setup to Mesos with Docker and also could provide some of our customers with a new setup.
Before I will give you a short description about snares I ran into during the migration, let’s have a quick overview on how Mesos works. We will have a look at Zookeeper, Mesos, Marathon and Docker.
Zookeeper acts as centralized key-value store for the Mesos cluster and as such has to be installed on both the Mesos-Master and -Slaves
Mesos is a distributed system kernel and runs on the Mesos-Masters and Slaves. The Masters distribute jobs and workload to the slaves and therefore need to know about their available ressources, e.g. RAM and CPU
Marathon is used for orchestration of docker containers and can access on information provided by Mesos.
Docker is one way to run containerized applications and used in our setup.
As we can see, there are several programs running simultaneously which creates needs for seamless integration.
What are obstacles you might run into when setting up your own cluster?
1. Connectivity:
When you set up e.g. different VMs to run your cluster, please make sure they are connected to each other. Which might look simple, can become frustrating when the Zookeeper nodes can’t find each other due to „wrong“ etc/hosts settings, such as
127.0.1.1 localhost
This should be altered to
127.0.1.1 $hostname, e.g. mesos-slave1
2. Configuration
Whenever you make changes to your configuration, it has to be communicated through your complete cluster. Sometimes it doesn’t even a need a service restart. Sometimes you may need to reboot. In desperate times you might want to purge packages and reinstall them. In the end it will work and you will happily run into

by TRISTAR MEDIA
3. Bugs
While Marathon provides you with an easy to use Web-UI to interact with your containers, it has one great flaw in the current version. As the behaviour is so random, you could tend to search for issues in your setup. You might or might not be able to make live changes to your configured containers. Worry not, the „solution“ may be simply using an older version of Marathon.
Version 1.4.8 may help.

by TRISTAR MEDIA
Have fun setting up your own cluster and avoiding annoying obstacles!
Edit 20180131 TA: fixed minor typo

Tim Albert
Senior Systems Engineer
Tim kommt aus einem kleinen Ort zwischen Nürnberg und Ansbach, an der malerischen B14 gelegen. Er hat in Erlangen Lehramt und in Koblenz Informationsmanagement studiert. Seit Anfang 2016 ist er bei uns tätig. Zuerst im Managed Services Team, dort kümmerte Tim sich um Infrastrukturthemen und den internen Support, um dann 2019 - zusammen mit Marius - Gründungsmitglied der ITSM Abteilung zu werden. In seiner Freizeit engagiert sich Tim in der Freiwilligen Feuerwehr – als Maschinist und Atemschutzgeräteträger -, spielt im Laientheater Bauernschwänke und ist auch handwerklich ein absolutes Allroundtalent. Angefangen von Mauern hochziehen bis hin zur KNX-Verkabelung ist er jederzeit...
Modern open source community platforms with Discourse
Investing into open source communities is key here at NETWAYS. We do a lot of things in the open, encourage users with open source trainings and also be part of many communities with help and code, be it Icinga, Puppet, Elastic, Graylog, etc.
Open source with additional business services as we love and do only works if the community is strong, and pushes your project to the next level. Then it is totally ok to say „I don’t have the time to investigate on your problem now, how about some remote support from professionals?“. Still, this requires a civil discussion platform where such conversations can evolve.
One key factor of an open source community is to encourage users to learn from you. Show them your appreciation and they will like it and start helping others as you do. Be a role model and help others on a technical level, that’s my definition of a community manager. Add ideas and propose changes and new things. Invest time and make things easier for your community.
 I’ve been building a new platform for monitoring-portal.org based on Discourse in the last couple of days. The old platform based on Woltlab was old-fashioned, hard to maintain, and it wasn’t easy to help everyone. It also was closed source with an extra license, so feature requests were hard for an open source guy like me.
Discourse on the other hand is 100% open source, has ~24k Github stars and a helping community. It has been created by the inventors of StackOverflow, building a conversation platform for the next decade. Is is fast, modern, beautiful and both easy to install and use.
Setup as Container
Discourse only supports running inside Docker. The simplest approach is to build everything into one container, but one can split this up too. Since I am just a beginner, I decided to go for the simple all-in-one solution. Last week I was already using the 1.9.0beta17, running really stable. Today they released 1.9.0, I’ll share some of the fancy things below already 🙂
Start on a fresh VM where no applications are listening on port 80/443. You’ll also need to have a mail server around which accepts mails via SMTP. Docker must be installed in the latest version from the Docker repos, don’t use what the distribution provides (Ubuntu 14.04 LTS here).
mkdir /var/discourse
git clone https://github.com/discourse/discourse_docker.git /var/discourse
cd /var/discourse
./discourse-setup
The setup wizard ask several questions to configure the basic setup. I’ve chosen to use monitoring-portal.org as hostname, and provided my SMTP server host and credentials. I’ve also set my personal mail address as contact. Once everything succeeds, the configuration is stored in /var/discourse/container/app.yml.
Nginx Proxy
My requirement was to not only serve Discourse at /, but also have redirects for other web applications (the old Woltlab based forum for example). Furthermore I want to configure the SSL certificates in a central place. Therefore I’ve been following the instructions to connect Discourse to a unix socket via Nginx.
apt-get install nginx
rm /etc/nginx/sites-enabled/default
vim /etc/nginx/sites-available/proxy.conf
server {
    listen 443 ssl;  listen [::]:443 ssl;
    server_name fqdn.com;
    ssl on;
    ssl_certificate      /etc/nginx/ssl/fqdn.com-bundle.crt;
    ssl_certificate_key  /etc/nginx/ssl/fqdn.com.key;
    ssl_protocols TLSv1.2 TLSv1.1 TLSv1;
    ssl_ciphers ECDHE-RSA-AES128-GCM-SHA256:ECDHE-ECDSA-AES128-GCM-SHA256:ECDHE-RSA-AES256-GCM-SHA384:ECDHE-ECDSA-AES256-GCM-SHA384:DHE-RSA-AES128-GCM-SHA256:DHE-DSS-AES128-GCM-SHA256:kEDH+AESGCM:ECDHE-RSA-AES128-SHA256:ECDHE-ECDSA-AES128-SHA256:ECDHE-RSA-AES128-SHA:ECDHE-ECDSA-AES128-SHA:ECDHE-RSA-AES256-SHA384:ECDHE-ECDSA-AES256-SHA384:ECDHE-RSA-AES256-SHA:ECDHE-ECDSA-AES256-SHA:DHE-RSA-AES128-SHA256:DHE-RSA-AES128-SHA:DHE-DSS-AES128-SHA256:DHE-RSA-AES256-SHA256:DHE-DSS-AES256-SHA:DHE-RSA-AES256-SHA:ECDHE-RSA-DES-CBC3-SHA:ECDHE-ECDSA-DES-CBC3-SHA:AES128-GCM-SHA256:AES256-GCM-SHA384:AES128-SHA256:AES256-SHA256:AES128-SHA:AES256-SHA:AES:CAMELLIA:DES-CBC3-SHA:!aNULL:!eNULL:!EXPORT:!DES:!RC4:!MD5:!PSK:!aECDH:!EDH-DSS-DES-CBC3-SHA:!EDH-RSA-DES-CBC3-SHA:!KRB5-DES-CBC3-SHA;
    ssl_prefer_server_ciphers on;
    # openssl dhparam -out /etc/nginx/ssl/dhparam.pem 4096
    ssl_dhparam /etc/nginx/ssl/dhparam.pem;
    # OCSP Stapling ---
    # fetch OCSP records from URL in ssl_certificate and cache them
    ssl_stapling on;
    ssl_stapling_verify on;
    location / {
        error_page 502 =502 /errorpages/discourse_offline.html;
        proxy_intercept_errors on;
        # Requires containers/app.yml to use websockets
        proxy_pass http://unix:/var/discourse/shared/standalone/nginx.http.sock:;
        proxy_set_header Host $http_host;
        proxy_http_version 1.1;
        proxy_set_header X-Forwarded-For $proxy_add_x_forwarded_for;
        proxy_set_header X-Forwarded-Proto https;
    }
}
ln -s /etc/nginx/sites-available/proxy.conf /etc/nginx/sites-enabled/proxy.conf
service nginx restart
Another bonus of such a proxy is to have a maintenance page without an ugly gateway error.
The full configuration can be found here.
Plugins
Installation is a breeze – just add the installation calls into the app.yml file and rebuild the container.
# egrep -v "^$|#" /var/discourse/containers/app.yml
templates:
  - "templates/postgres.template.yml"
  - "templates/redis.template.yml"
  - "templates/web.template.yml"
  - "templates/web.ratelimited.template.yml"
expose:
params:
  db_default_text_search_config: "pg_catalog.english"
env:
  LANG: en_US.UTF-8
  DISCOURSE_HOSTNAME: fqdn.com
  DISCOURSE_DEVELOPER_EMAILS: 'contact@fqdn.com'
  DISCOURSE_SMTP_ADDRESS: smtp.fqdn.com
  DISCOURSE_SMTP_PORT: 587
  DISCOURSE_SMTP_USER_NAME: xxx
  DISCOURSE_SMTP_PASSWORD: xxx
volumes:
  - volume:
      host: /var/discourse/shared/standalone
      guest: /shared
  - volume:
      host: /var/discourse/shared/standalone/log/var-log
      guest: /var/log
hooks:
  after_code:
    - exec:
        cd: $home/plugins
        cmd:
          - git clone https://github.com/discourse/docker_manager.git
          - git clone https://github.com/discourse/discourse-akismet.git
          - git clone https://github.com/discourse/discourse-solved.git
run:
  - exec: echo "Beginning of custom commands"
  - exec: echo "End of custom commands"
./launcher rebuild app
Akismet checks against spam posts as you know it from WordPress. We’ve learned that spammers easily crack reCaptcha, and the only reliable way is filtering the actual posts.
The second useful plugin is for accepting an answer in a topic, marking it as solved. This is really useful if your platform is primarily used for Q&A topics.
Getting Started
Once everything is up and running, navigate to your domain in your browser. The simple setup wizard greets you with some basic questions. Proceed as you like, and then you are ready to build the platform for your own needs.
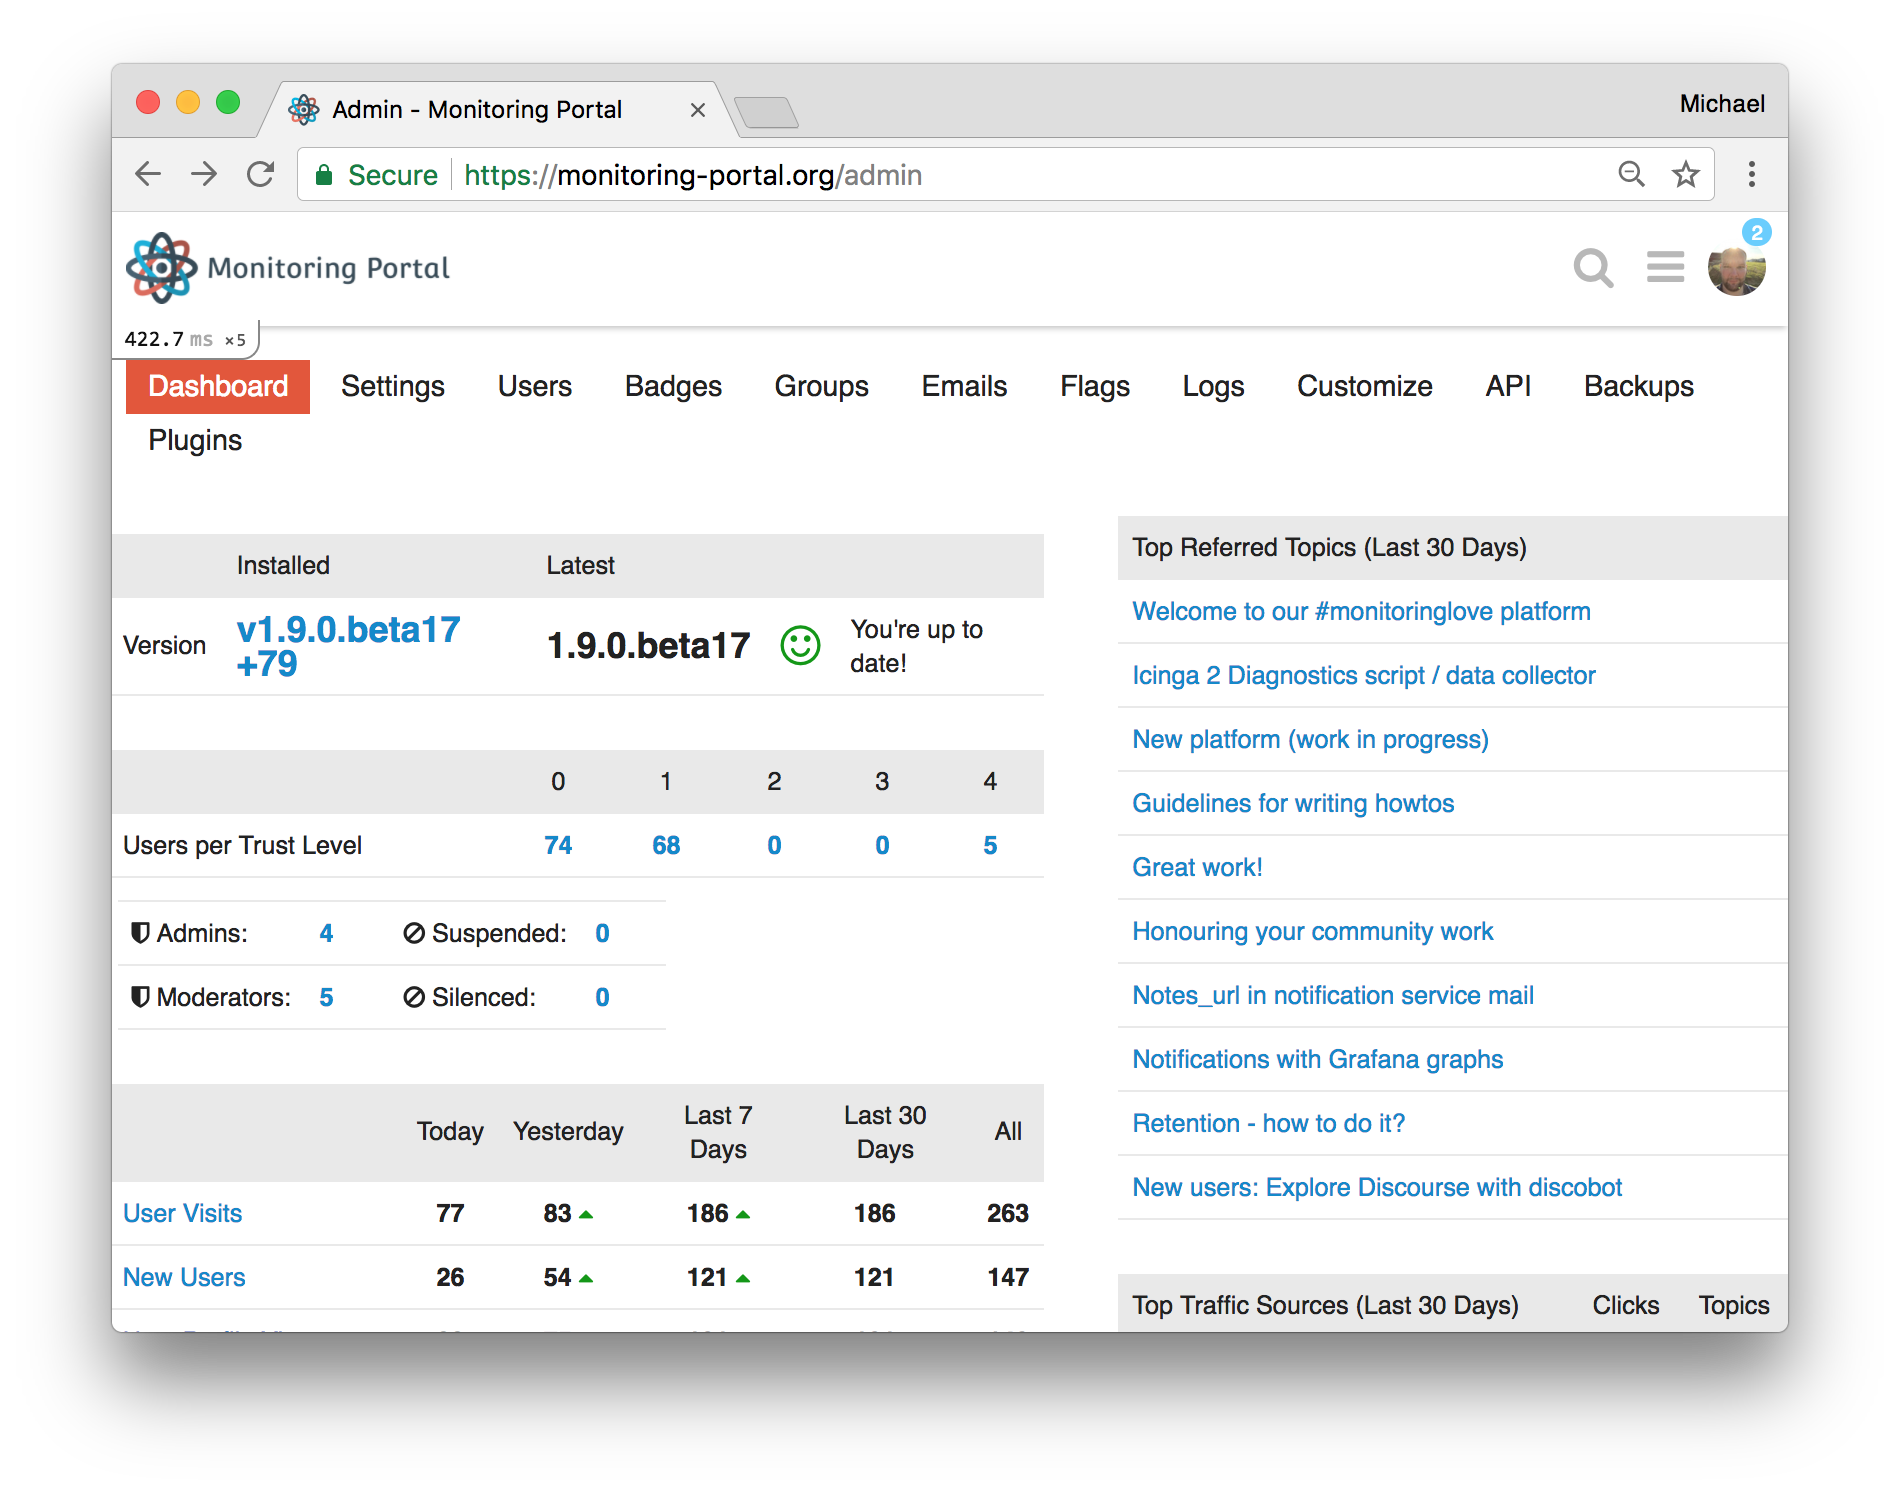
The admin interface has lots of options. Don’t fear it – many of the default settings are from best practices, and you can always restore them if you made a mistake. There’s also a filter to only list overridden options 🙂
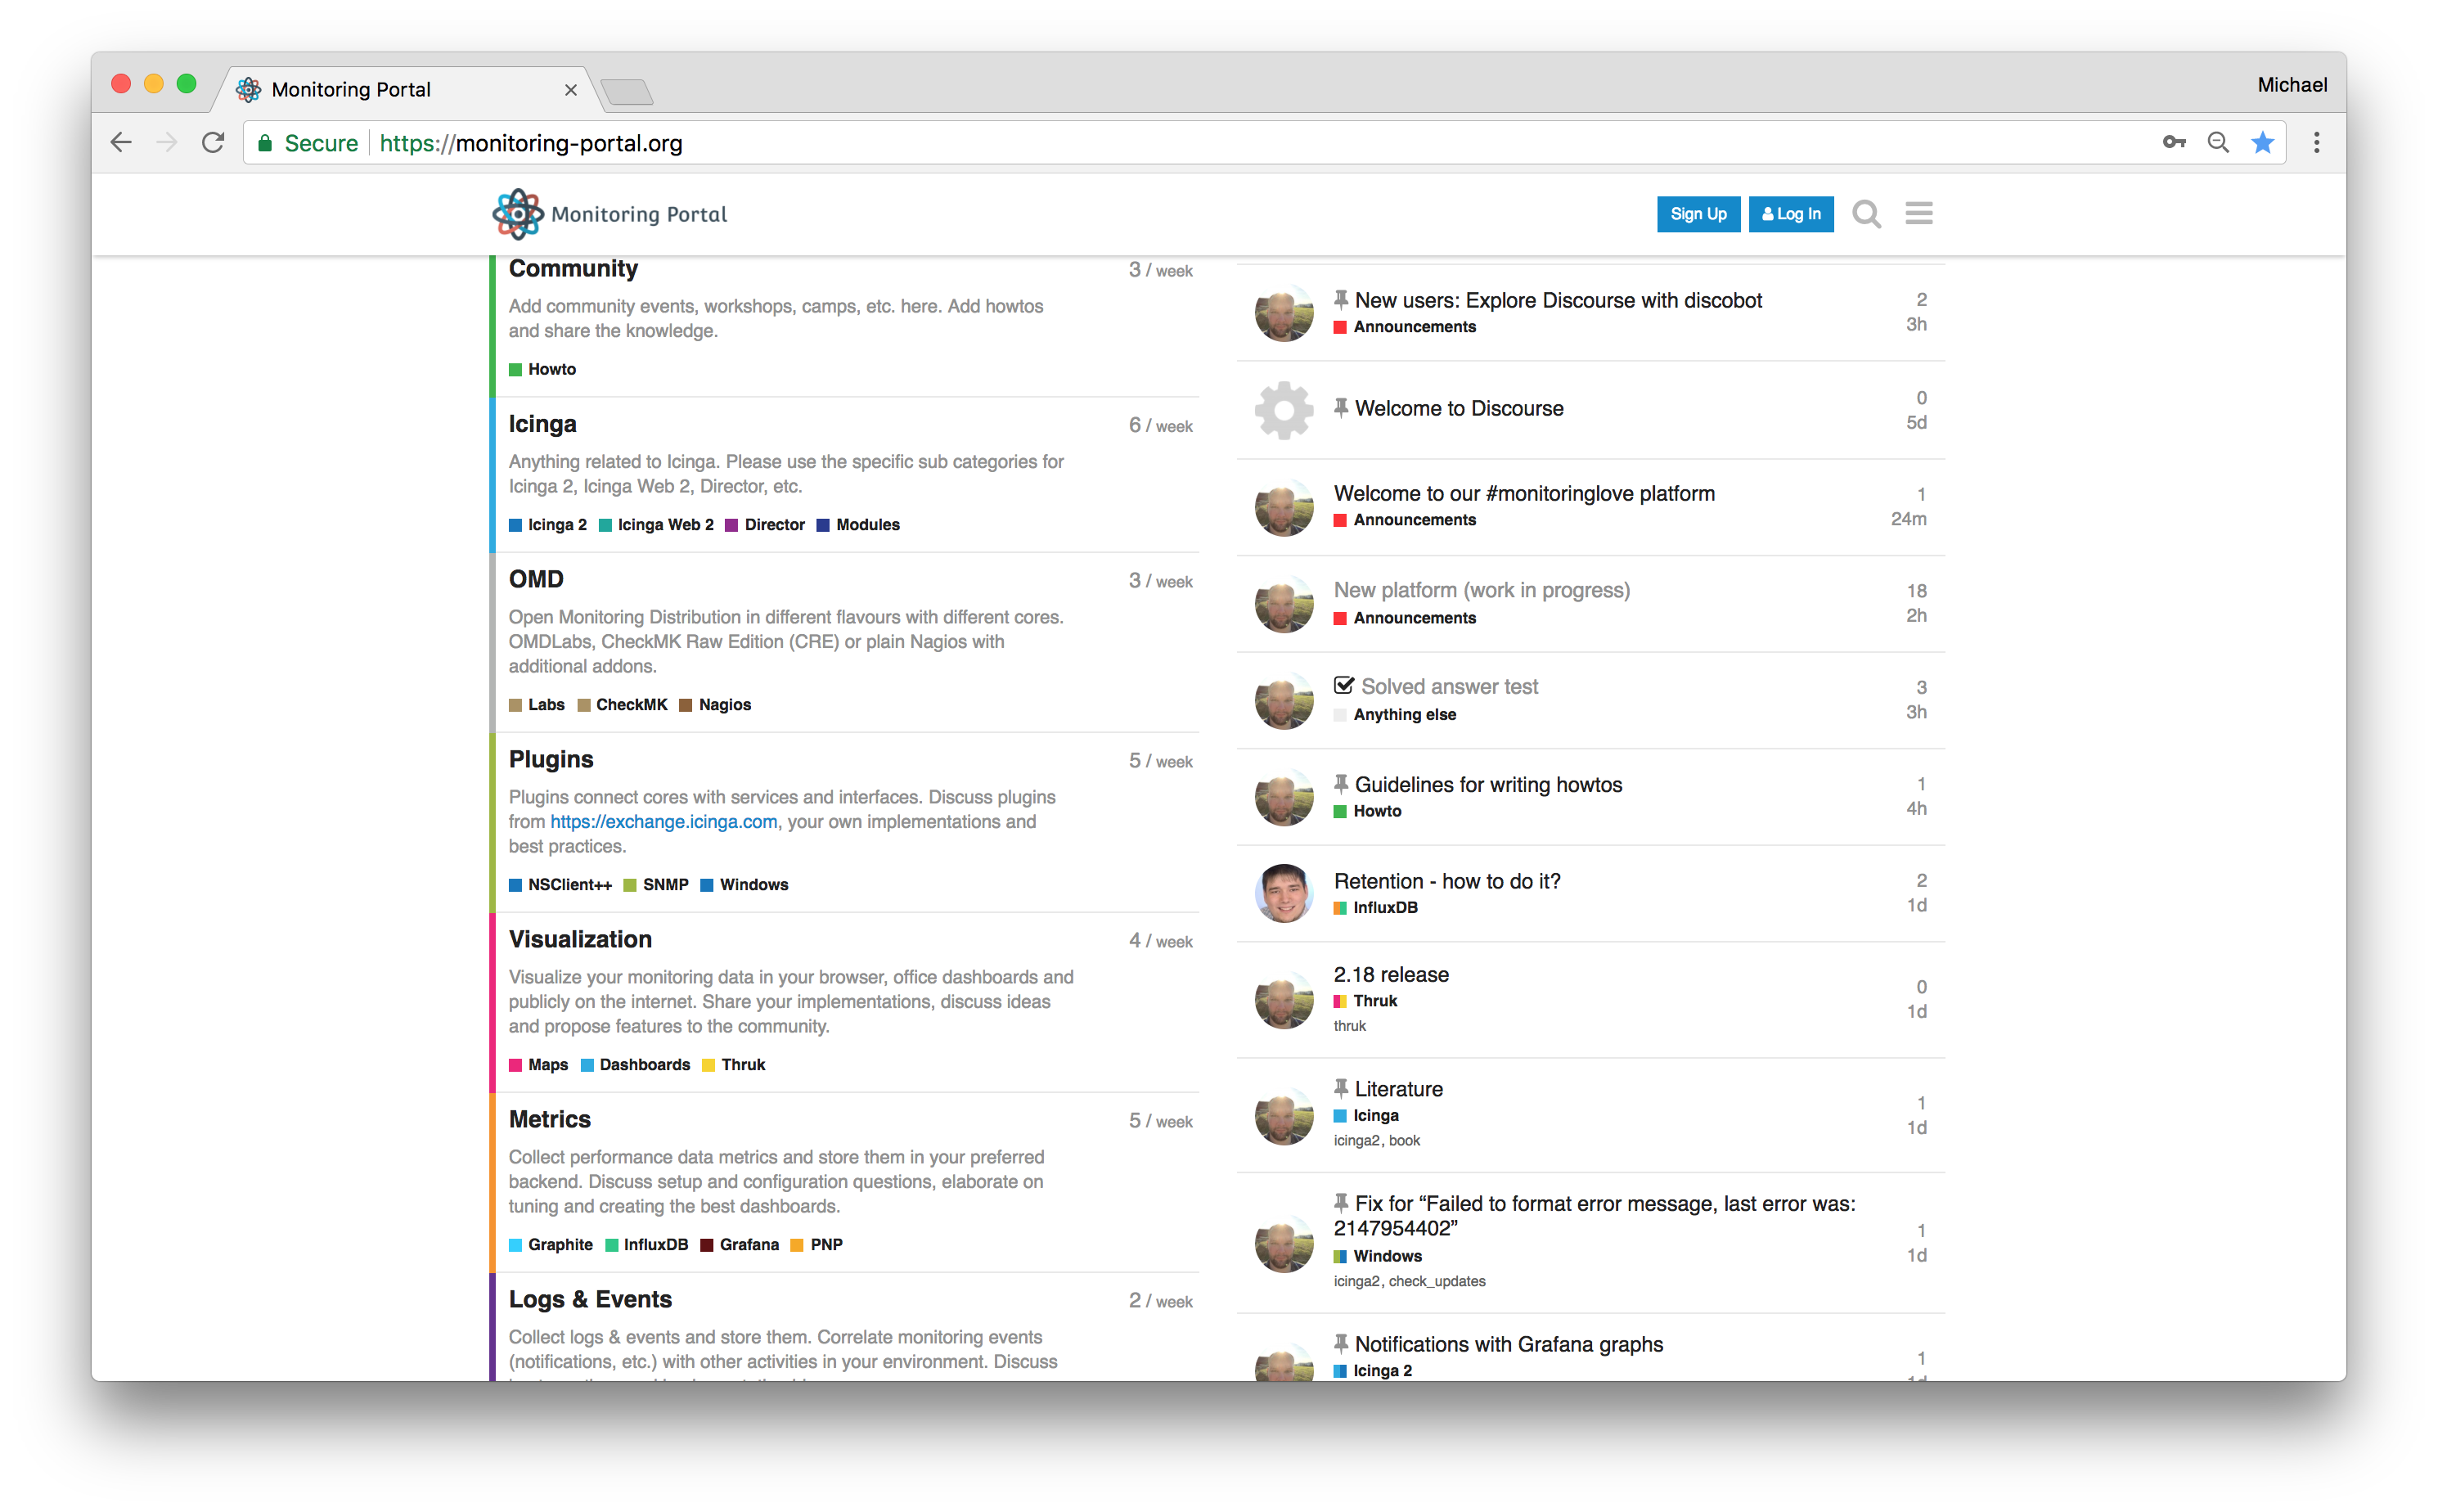
Categories and Tags
Some organisation and structure is needed. The old-fashioned way of choosing a sub forum and adding a topic in there is gone. Still Discourse offers you to require a category from users. Think of monitoring – a question on the Icinga Director should be highlighted in a specific category to allow others to catch up.
By the way – you can subscribe to notifications for a specific category. This helps to keep track only for Icinga related categories for example.
In addition to that, tags help to refine the topics and make them easier to search for.
Communication matters
There are so many goodies. First off, you can start a new topic just from the start page. An overlay page which saves the session (!) is here for you to edit. Start typing Markdown, and see it pre-rendered live on the right side.
You can upload images, or paste an URL. Discourse will trigger a job to download this later and use a local cache. This avoids broken images in the future. If you paste a web link, Discourse tries to render a preview in „onebox“. This also renders Github URLs with code preview.
Add emotions to your discussion, appreciate posts by others and like them, enjoy the conversation and share it online. You can even save your draft and edit it amongst different sessions, e.g. after going home.
Tutorials, Trust Level and Rewards
Once you register a new account (you can add oauth apps from Twitter, Github, etc.!), a learning bot greets you. This interactive tutorial helps you learning the basics with likes, quotes, urls, uploads, and rewards you with a nice certificate in the end.
New users don’t start with full permissions, they need to earn their trust. Once they proceed with engaging with the community, their trust level is raised. The idea behind this is not to have moderators and admins regulating the conversation, but let experienced members to it. Sort of self healing if something goes wrong.
Users who really engage and help are able to earn so-called badges. These nifty rewards are highlighted on their profile page, e.g. for likes, number of replies, shared topics, even accepted solutions for questions. A pure motivation plaything built into this nice piece of open source software.
Wiki and Solved Topics
You can change topics to wiki entries. Everyone can edit them, this way you’ll combine the easiness of writing things in Markdown with a full-blown documentation wiki.
Accepting a replay as solution marks a topic as „solved“. This is incredibly helpful for others who had the same problem.
Development
As an administrator, you’ll get automated page profiling for free. This includes explained SQL queries, measured page load time, and even flame graphs.
If you ever need to reschedule a job, e.g. for daily badge creation, admins can access the Sidekiq web UI which really is just awesome.
Plugin development seems also easy if you know Ruby and EmberJS. There are many official plugins around which tested before each release.
Discourse also has a rich REST API. Even a monitoring endpoint.
Maintenance
You can create backups on-demand in addition to regular intervals. You can even restore an old backup directly from the UI.

Conclusion
 Discourse is used by many communities all over the world – Graylog, Elastic, Gitlab, Docker, Grafana, … have chosen to use the power of a great discussion platform. So does monitoring-portal.org as a #monitoringlove community. A huge thank you to the Discourse team, your software is pure magic and just awesome 🙂
My journey in building a new community forum from scratch in just 5 days can be read here 🙂
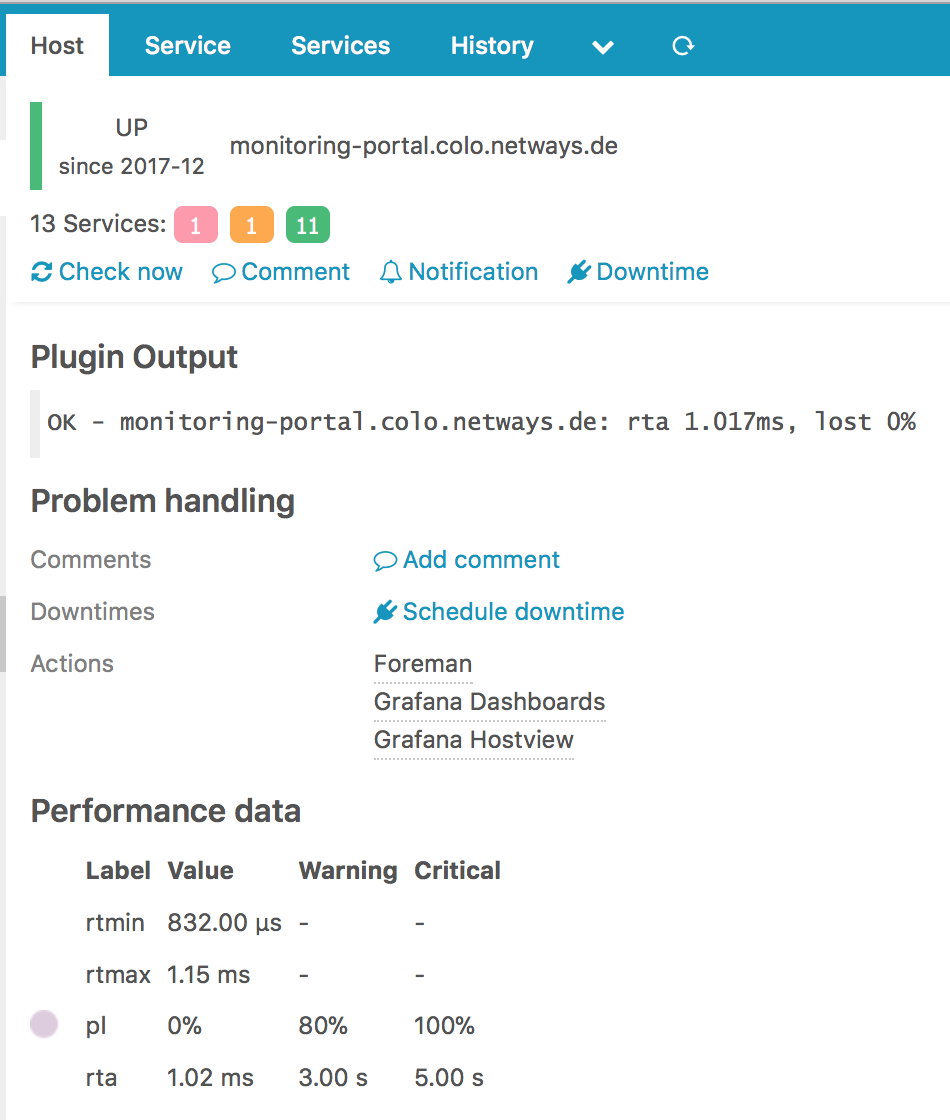
monitoring-portal.org running Discourse is fully hosted at NETWAYS, including SSL certificates, Puppet deployment and Icinga for monitoring. Everything I need to build an awesome community platform. You too?
Icinga 2 – Monitoring automatisiert mit Puppet Teil 8: Integration von Icinga Web 2
![]() Zum Ausklang des Jahres 2017 gibt es nochmals einen Post zum Thema Puppet und Icinga. Es geht heute um das Ziel, einen Icinga-Server inklusive Icinga Web 2 mittels Puppet zu managen. Die Icinga IDO sowie eine Datenbank zur Authentifizierung am Icinga Web 2 sind beide als MySQL-Datenbanken realisiert. Kommandos von Icinga Web 2 werden zum Icinga-Core via Icinga-2-API übertragen.
Zum Ausklang des Jahres 2017 gibt es nochmals einen Post zum Thema Puppet und Icinga. Es geht heute um das Ziel, einen Icinga-Server inklusive Icinga Web 2 mittels Puppet zu managen. Die Icinga IDO sowie eine Datenbank zur Authentifizierung am Icinga Web 2 sind beide als MySQL-Datenbanken realisiert. Kommandos von Icinga Web 2 werden zum Icinga-Core via Icinga-2-API übertragen.
Als Plattform kommt ein CentOS 7 zum Einsatz. Damit muss für die aktuellen Pakete zum Icinga Web 2 ab Version 2.5.0 der verwendete Apache den PHP-Code mittels FastCGI ausführen.
Voraussetzung ist, dass die erforderlichen Puppet-Module icinga-icinga2, icinga-icingaweb2, puppetlabs-mysql und deren jeweilige Abhängigkeiten installiert sein müssen.
Beginnen wir zuerst mit einigen Variablen, die wir setzen, um im nachfolgenden Code keine Redundanzen zu haben. Wir setzen hier wie die Datenbanken für die IDO und fürs Icinga Web 2 heißen sollen und mit welchem Account jeweils darauf zugegriffen werden soll. Zusätzlich kommt noch der Name und das Passwort des Benutzers für die Icinga-2-API hinzu.
$ido_db_name = 'icinga'
$ido_db_user = 'icinga'
$ido_db_pass = 'icinga'
$api_user    = 'icingaweb2'
$api_pass    = '12e2ef553068b519'
$web_db_name = 'icingaweb2'
$web_db_user = 'icingaweb2'
$web_db_pass = 'icingaweb2'
Der nun folgende Code ist für Puppet 4 und neuer gedacht, da das Feature bzgl. Reihenfolge der Deklarationen in der Datei vorausgesetzt wird.
Für CentOS werden im Vorfeld zusätzliche Repositories benötigt, EPEL für die Plugins und SCL für das FastCGI PHP in der Version 7. Die Klasse icinga2 kümmert sich nicht nur um die Grundkonfiguration, sondern außerdem auch um die Einbindung des Icinga-Repos.
package { ['centos-release-scl', 'epel-release']:
  ensure => installed,
}
class { '::icinga2':
  manage_repo => true,
}
Als nächstes kümmern wir uns um den MySQL-Server und die von uns benötigten Datenbanken für die IDO und das Icinga Web 2. Beide laufen auf dem selben Host wie Icinga 2 und Icinga Web 2.
include ::mysql::server
mysql::db { $ido_db_name:
  user     => $ido_db_user,
  password => $ido_db_pass,
  host     => 'localhost',
  grant    => ['SELECT', 'INSERT', 'UPDATE', 'DELETE', 'DROP', 'CREATE VIEW', 'CREATE', 'ALTER', 'INDEX', 'EXECUTE'],
}
mysql::db { $web_db_name:
  user     => $web_db_user,
  password => $web_db_pass,
  host     => 'localhost',
  grant    => ['ALL'],
}
Nun können wir das IDO-Feature von Icinga 2 konfigurieren und aktivieren. Da es im Zusammenhang der Defined Resources für die Datenbank und das Feature zu einer Abhängigkeit kommt, die nicht via Top-Down-Dependency gelöst werden kann, muss hier mit require gearbeitet werden, damit die Datenbank vorher erzeugt wird.
class { '::icinga2::feature::idomysql':
  database      => $ido_db_name,
  user          => $ido_db_user,
  password      => $ido_db_pass,
  import_schema => true,
  require       => Mysql::Db[$ido_db_name],
}
Da Icinga Web 2 Kommandos mittels API an Icinga 2 senden soll, benötigen wir eine CA sowie die Aktivierung der Features API selbst. Die Certificate Authority soll eine von Icinga verwaltete CA sein. Das erfordert die Deklaration der Klasse icinga2::Pki::ca, die sich um genau dieses kümmert. Das Feature muss dann mit none für den Parameter pki werden, da sonst mit dem Default, die Puppet-Zertifikate verwendet werden und damit nicht mehr zur CA passen würden.
Zusätzlich erzeugen wir in einer Konfigurationsdatei noch einen API-User, der entsprechend eingeschränkte Rechte hat, um dann von Icinga Web 2 verwendet zu werden Kommandos zu übertragen.
class { '::icinga2::feature::api':
  pki => 'none',
}
include ::icinga2::pki::ca
::icinga2::object::apiuser { $api_user:
  ensure      => present,
  password    => $api_pass,
  permissions => [ 'status/query', 'actions/*', 'objects/modify/*', 'objects/query/*' ],
  target      => "/etc/icinga2/conf.d/api-users.conf",
}
Das Icinga-Repository ist schon aktiviert und wir ziehen die Installation der Pakete für Icinga Web 2 aus der Klasse icingaweb2 heraus. Damit profitieren wir davon, dass die abhängigen Pakete für PHP mit FastCGI zu diesem Zeitpunkt schon installiert werden und wir den Dienst rh-php71-php-fpm schon vor der Installation von icinga Web 2 mit allen benötigten PHP-Modulen starten können. Anders herum müsste dafür Sorge getragen werden die Dienst nach icingaweb2 nochmals für einen Neustart zu triggern.
Zusätzlich kommen noch die Standard-Plugins und der Apache aufs System. Bevor der Apache-Service deklariert wird, soll noch die erforderliche Apache-Konfiguration fürs Icinga Web 2 ins Konfigurationsverzeichnis des Webservers abgelegt werden. Dieses Beispiel für FastCGI ist erst im Module ab Version 2.0.1 von puppet-icingaweb2 enthalten.
TIPP: Die hier verwendete File-Resource mit der Quelle auf das Example aus dem offiziellen Modul sollte in Produktion nicht verwendet werden, sondern nur als Beispielvorlage für eine eigene Source dienen.
package { ['icingaweb2', 'icingacli', 'httpd', 'nagios-plugins-all']:
  ensure => installed,
}
file { '/etc/httpd/conf.d/icingaweb2.conf':
  ensure => file,
  source => 'puppet:///modules/icingaweb2/examples/apache2/for-mod_proxy_fcgi.conf',
  notify => Service['httpd'],
}
service { 'httpd':
  ensure => running,
  enable => true,
}
Das in Abhängigkeit vom Paket icingaweb2 installierte PHP mit dem FastCGI-Dienst kann nun konfiguriert und gestartet werden. Die hier verwendete file_line Resource kann bei bedarf durch eine mit Augeas gemanagte ersetzt werden.
file_line { 'php_date_time':
  path  => '/etc/opt/rh/rh-php71/php.ini',
  line  => 'date.timezone = Europe/Berlin',
  match => '^;*date.timezone',
}
~> service { 'rh-php71-php-fpm':
  ensure => running,
  enable => true,
}
Nachdem nun alle Voraussetzungen gegeben sind, kümmern wir uns abschließend um Icinga Web 2. Dies unterteilt sich in zwei Schritte. Icinga Web 2 ist als aller erstes ein Framework für Weboberflächen, die spezifischen Sachen fürs Monitoring ist in einem Modul implementiert. Da es viele weitere zusätzliche Module gibt, folgt auch das Puppet-Modul diesem Schema.
class { 'icingaweb2':
  manage_package => false,
  import_schema  => true,
  db_name        => $web_db_name,
  db_username    => $web_db_user,
  db_password    => $web_db_pass,
  require        => Mysql::Db[$web_db_name],
}
Zuerst wird das Framework mit dem zur Authentifizierung nötigen Datenbankzugriff konfiguriert und erst dann das Monitoring-Modul. Für dieses ist der IDO-Zugriff zwingend erforderlich und der Transportweg für die zusendenden Kommandos wird mittels API konfiguriert.
class { 'icingaweb2::module::monitoring':
  ido_host        => 'localhost',
  ido_db_name     => $ido_db_name,
  ido_db_username => $ido_db_user,
  ido_db_password => $ido_db_pass,
  commandtransports => {
    icinga2 => {
      transport => 'api',
      username  => $api_user,
      password  => $api_pass,
    }
  }
}
Bleibt als letzten allen unseren Bloglesern ein Frohes Neues Jahr zu wünschen!

Lennart Betz
Senior Consultant
Der diplomierte Mathematiker arbeitet bei NETWAYS im Bereich Consulting und bereichert seine Kunden mit seinem Wissen zu Icinga, Nagios und anderen Open Source Administrationstools. Im Büro erleuchtet Lennart seine Kollegen mit fundierten geschichtlichen Vorträgen die seinesgleichen suchen.
"Willkommen auf der dunklen Seite der Macht, Alexander …"
 Nein, ich meine nicht die antagonistische Fraktion aus einer sehr populären Filmreihe (deren Name nicht genannt werden muss), sondern die Apple-Fraktion bei NETWAYS.
Letzten Monat habe ich nämlich meine Ausbildung zum Fachinformatiker für Anwendungsentwicklung abgeschlossen und wurde in die Development-Abteilung übernommen.
Neuer Status – neues Gehalt, neue Aufgaben … und neues Arbeitsgerät. Ich habe mich bewusst für ein MacBook Pro entschieden, weil auf dieser Plattform sehr vieles viel besser und einfacher funktioniert und ich nicht bei jeder Kleinigkeit erst den Linux-Kernel patchen und neu kompilieren, SELinux abschalten oder die IPTables-Regeln anpassen muss. 😉
Wer weiß wann ich mit dem nächsten Kunden von Angesicht zu Angesicht zu tun haben werde – diesbzgl. will ich keine Risiken eingehen.
Abstriche muss ich keine machen – schließlich bietet MacOS X alles, was das Entwickler-Herz begehrt. Außer vielleicht …
Container
Auf Linux haben sie sich breit gemacht wie ein Türsteher: Docker, LXC, LXD und wie sie alle heißen. Auch BSD macht mit seinen Jails keine Kompromisse in Sachen Virtualisierung und Sicherheit.
Umso mehr wundert es mich, dass das BSD-basierende MacOS X dieses Feature nicht übernommen hat. Aber es wäre kein *nix-System, wenn man das nicht mit ein wenig Geschick nachrüsten könnte …
Dann eben so …
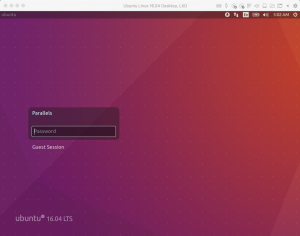 Auf meinem alten Arbeitsgerät habe ich Ubuntu 16.04 verwendet. Diese GNU/Linux-Distribution enthält von Haus aus LXD in den Paketquellen, womit ich in einer leichtgewichtigen und sicher isolierten Umgebung mal schnell was ausprobieren konnte.
Dieses Werkzeug kann ich mit einer Virtuellen Maschine problemlos weiterhin verwenden – nicht nur in der VM selbst, sondern auch vom Mac-Host aus. Genau dafür braucht man das o. g. „wenig Geschick“ …
LXD Server einrichten
Man logge sich in die VM ein und erlange Administratorrechte. Dann installiert man LXD und richtet diesen darauf hin ein:
$ sudo -i
(...)
# apt install lxd
(...)
# lxd init
Name of the storage backend to use (dir or zfs) [default=dir]:
Would you like LXD to be available over the network (yes/no) [default=no]? yes
Address to bind LXD to (not including port) [default=all]:
Port to bind LXD to [default=8443]:
Trust password for new clients:
Again:
Do you want to configure the LXD bridge (yes/no) [default=yes]?
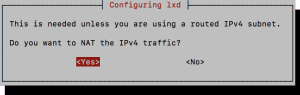 Fast alle Abfragen des Installations-Assistenten können bedenkenlos mit der Eingabetaste bestätigt werden. Die von mir hervorgehobene Frage allerdings muss mit „yes“ beantwortet werden – ansonsten fällt die Nutzung vom Host aus ins Wasser. Außerdem muss ein einigermaßen sicheres Passwort gewählt werden.
Der Frage nach der „LXD bridge“ folgt ein weiterer, „pseudo-grafischer“ Installations-Assistent. Dessen Fragen kann man ausnahmslos mit der Eingabetaste bestätigen.
Des weiteren wird später die IP der VM benötigt:
# ifconfig
enp0s5    Link encap:Ethernet  HWaddr 00:1c:42:8b:e9:ba
          inet addr:10.211.55.19  Bcast:10.211.55.255  Mask:255.255.255.0
          inet6 addr: fdb2:2c26:f4e4:0:880a:a527:1a6:1130/64 Scope:Global
          inet6 addr: fdb2:2c26:f4e4:0:fc54:870c:56af:cba0/64 Scope:Global
          inet6 addr: fe80::fbc7:ab4d:d29f:e227/64 Scope:Link
(...)
lo        Link encap:Local Loopback
          inet addr:127.0.0.1  Mask:255.0.0.0
          inet6 addr: ::1/128 Scope:Host
(...)
lxdbr0    Link encap:Ethernet  HWaddr 00:00:00:00:00:00
          inet addr:10.83.127.1  Bcast:0.0.0.0  Mask:255.255.255.0
          inet6 addr: fdb3:61e3:ffb6:f62f::1/64 Scope:Global
          inet6 addr: fe80::4024:c9ff:fe4a:691b/64 Scope:Link
(...)
LXD Client einrichten
Da die Entwickler von LXD sich bemüht haben, nicht von Linux-spezifischen Funktionalitäten Gebrauch zu machen, funktioniert der LXD Client auch auf MacOS. Den muss man nur noch vom LXD Server in Kenntnis setzen.
Sobald das getan ist, kann auch schon der erste Container in Betrieb genommen werden.
$ brew install lxc
(...)
$ lxc remote add u1604vm 10.211.55.19
Certificate fingerprint: a761f551dffdf47d9145da2aa16b4f6be242d960ce1697994c969e495b0724fd
ok (y/n)? y
Admin password for u1604vm:
Client certificate stored at server:  u1604vm
$ lxc launch ubuntu:16.04 u1604vm:test1
Creating test1
Starting test1ge: rootfs: 100% (37.78MB/s)
$ lxc exec u1604vm:test1 -- bash
root@test1:~# man perlfunc
Fazit
Es muss nicht immer Docker sein.
Gerade wenn das Testsystem sich möglichst so verhalten soll wie eine VM oder eine Physische Maschine ist LXD auf jeden Fall einen Blick Wert – auch auf dem Mac.

Alexander Klimov
Senior Developer
Alexander hat 2017 seine Ausbildung zum Developer bei NETWAYS erfolgreich abgeschlossen. Als leidenschaftlicher Programmierer und begeisterter Anhänger der Idee freier Software, hat er sich dabei innerhalb kürzester Zeit in die Herzen seiner Kollegen im Development geschlichen. Wäre nicht ausgerechnet Gandhi sein Vorbild, würde er von dort aus daran arbeiten, seinen geheimen Plan, erst die Abteilung und dann die Weltherrschaft an sich zu reißen, zu realisieren - tut er aber nicht. Stattdessen beschreitet er mit der Arbeit an Icinga Web 2 bei uns friedliche Wege.


