Seite wählen

NETWAYS Blog

Replace spaces with tabs in Visual Studio 2017

Visual Studio has several source code edit settings. This defaults to 4 spaces and no tabs by default and is slightly different to what we use in Icinga 2. There we put focus on tabs in our code style.
Editing the Icinga 2 source code on Windows with Visual Studio requires adjusting the editor settings. Navigate into Tools > Options > Text Editor > C# and C++ and adjust the settings to „Keep tabs“.


I accidentally forgot to specify these settings for C# too, and had the problem that half of the Icinga 2 setup wizard code had 4 spaces instead of tabs. Luckily I’ve found this blog post which sheds some lights in the comments.
Hit Ctrl+H to open the replace search window. Tick the icon to use regular expressions and search for „((\t)*)([ ]{4})“. Add „\t“ as replacement text.

Happy coding for Icinga 2 v2.8 – ready for OSMC 🙂

Was macht eigentlich . . .

. . . NSClient++ ? Länger haben wir hier im Blog nichts mehr zum Thema NSClient geschrieben. Grund genug um mal wieder den aktuellen Entwicklungsstand zu überprüfen.
Aktuell wird der Monitoring Agent in 2 Strängen weiterentwickelt. Die Version 0.4.4 ist als stable markiert und bekommt nur noch bugfixes und kleinere Erweiterungen. In Version 0.5.0 wurden einzelne Module komplett neu geschrieben. Mit der aktuellen 0.5.0.59 wurde weiter an der Stabilität und einzelnen Checks gearbeitet.
nsclient-logoBesonders hervorzuheben sind im 0.5er Release der Webserver, der ssl gesichert und REST-apifiziert Kommandos entgegen nimmt und Informationen zurückliefert, Auch ist es in der aktuellen Version möglich Performancedaten direkt an graphite zu schreiben, was besonders in Großen Umgebungen zu einer starken Entlastung des monitoring servers (egal ob icinga 1 oder 2) führen kann. Um den überwachten Server besser zu schützen beendet NSClient jetzt alle von ihm angestoßenen Skripte wenn es selbst beendet wird, damit keine Langläufer mehr verloren gehen.
Bei allen Verbesserungen in 0.5 sollte man aber nicht vergessen, dass diese Version noch beta ist und nur mit der nötigen Vorsicht verwendet werden sollte.

Christoph Niemann
Christoph Niemann
Senior Consultant

Christoph hat bei uns im Bereich Managed Service begonnen und sich dort intensiv mit dem internen Monitoring auseinandergesetzt. Seit 2011 ist er nun im Consulting aktiv und unterstützt unsere Kunden vor Ort bei größeren Monitoring-Projekten und PERL-Developer-Hells.

Windows performance counters with NSClient++ and Graphite

Windows performance counters have been there for ages. While modern interfaces such as WMI attempt to replace performance counters they still provide access to unique metrics. Fetching performance counters through NSClient++ is helped with the check_pdh query.
We’ve had an interesting issue with performance counters being received from a Windows client and then written to  Graphite. The involved components in this setup are

  • Icinga 2 as master
  • GraphiteWriter feature enabled and Graphite running
  • An Icinga 2 client on the windows machine checked via cluster config sync
  • nscp-local“ CheckCommand objects for querying nscp.exe directly (config sync, global zone)
  • NSClient++ installed on the Windows client


The Problem

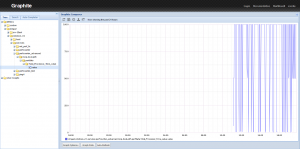
perfcounter_errorGraphite Web refuses to display any value for that metric as seen in the screenshot. A similar problem is discussed at the monitoring portal (German).
While further analysing the problem we’ve come around this blog post. It did not help resolve the problem but provided insights on the problem within Graphite itself.
The culprit lies in the performance data label containing the „%“ character. You will encounter similar issue with the „*“ character. The filesystem does not allow to store and load these files.
There’s an issue on the Graphite bug tracker which targets dealing with special characters and better error handling.
 

The Solution

It may sound reasonable to remove such strings in the Carbon Cache backend, or use a shell wrapper for calling the nscp.exe and reformatting the returned metrics. Though those are just workarounds for the real issue.
perfcounter_fixedAt first glance we looked into perf-config but that only allows to modify the performance data label suffix. The documentation is still a TODO so it was more or less reading the source code and figuring out what other options are available.
In the end it turned out to be far more easy – Michael Medin, you’re a genius – perf-syntax provides the ability to just format your metrics as plugin performance data for your likings. The following example overrides the counter label to „Processor Time“ – Graphite works again!

C:\Program Files (x86)\NSClient++>nscp.exe client --load-all --log info -b -q check_pdh counter="\Processor(_Total)\% Processor Time" perf-syntax="Processor Time"
11:02 OK: \Processor(_Total)\% Processor Time = 0|'Processor Time_value'=0;0;0


Icinga 2 Integration

The nscp-local CheckCommand definitions must be included by editing the icinga2.conf file on both the master and the client.

include <nscp-local>

If you prefer to use your own CheckCommand definition ensure to deploy it using a global zone defined on both the master and the client.
CheckCommand example:

object CheckCommand "nscp-local-pdh" {
        import  "nscp-local"
        arguments += {
            "counter" = {
                value = "counter=$pdh_counter$"
                required = true
                skip_key = true
            }
            crit = {
                value = "crit=value > $pdh_crit$"
                skip_key = true
            }
            warn = {
                value = "warn=value > $pdh_warn$"
                skip_key = true
            }
            "perf-syntax" = {
                 value = "perf-syntax=$pdh_perfsyntax$"
                 skip_key = true
            }
        }
        vars.nscp_query = "check_pdh"
        vars.pdh_perfsyntax = "$pdh_counter$"
}

Service apply example (via cluster config sync):

apply Service "perfcounter_test" {
    import "generic-service"
    check_command = "nscp-local-pdh"
    vars.pdh_counter = "\\Processor(_total)\\% Processor Time"
    vars.pdh_perfsyntax = "Total Processor Time"
    vars.pdh_warn = "1"
    vars.pdh_crit = "5"
    assign where host.address
}

 
I’ve created an Icinga 2 issue for extending the Icinga 2 NSCP CheckCommands to provide the perf-config and perf-syntax natively.
 

More Hints

NSClient++ 0.4.2 changed the performance data label for counters and added the „_value“ suffix. More recent versions allowed to override the suffix by defining the perf-config attribute. Although there is a bug which does not allow to remove the suffix. This should be fixed in the most recent stable release.

perf-config=*(suffix:none)


Conclusion

A tricky problem which probably affects a lot of users. A benefit of Open Source development – read the source, Luke 🙂
read_the_source_luke
(Copyright by http://blog.codinghorror.com/learn-to-read-the-source-luke/)

Windows git tools

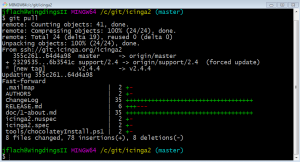
From time to time I start up my Windows 7 VirtualBox because there is some Windows-specific issue in Icinga 2 to solve. And the first thing to do then is to pull the Icinga 2 repository. The obvious way to do that is to enter git pull in the right directory at least on *nix. But Windows is not Linux and likes to everything a bit more graphical so I put my cynicism aside and tried out two graphical Git tools (again): TortoiseGit and SourceTree

TortoiseGit

9Hl9Izb
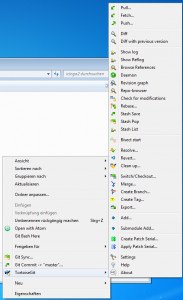
I used TortoiseSVN back in 2006/7 (that’s a long time so I might remember things incorrectly) and it was my first interaction with version control, without really knowing what version control was. And I wasn’t particularly fond of it, especially the gigantic right-click-context-menu was of my distaste. Now, nearly ten years later, I’m testing its sister software. And this time I know what I’m doing, I hope.
It all looks familiar but less Windows XPish. The context menus are still there but aren’t as intrusive as I remember them to be but I still get lost configuring it. Where or how do I add a SSH Key again? After that is taken care of it is time to check how it holds up against plain Git in a shell.
Commit, push, pull and fetch all work like expected. Amends are easy to make, bisect works reasonably well but can’t seem to find an equivalent of something like git rebase -i HEAD~3. One thing that stood out was the log, it’s neat. A bit ugly but really neat.
I’m surprised how good TortoiseGit works, yet there seems to be no way to access the full power of Git in case something goes really wrong. All you can do is delete the repository and delete the repo and clone it anew.

SourceTree

I used SourceTree when I first started at NETWAYS in 2014 and abandoned it after a short while. It looked nice but had too many problems to be of much use, so let’s see how it changed in over a year.
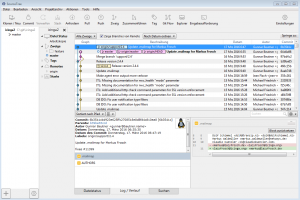
sourcetreeThe first change I noticed is the installer, it now requires you to create an Atlassian account. After I gave my E-mail to Atlassian and accepted they may send me whatever information they think might interest me (you don’t get a choice there) I am greeted by a much smoother interface than a year ago, in German because the language default is based on you operating systems locale.
And what else did change? Not much, everything is still where it was. Commit still commits and pull still pulls. When I first used SourceTree I did not get too deep into it’s features but trying out a few of them I found them to be lacking: like TortoiseGit SourceTree is mostly just a fancy wrapper around Git commands, but SourceTree is missing bisect. Compared to TortoiseGit its actions are also hidden a lot deeper inside of sub menus, for example Actions->Resolve Conflicts->Launch External Merge Tool, to start vimdiff. To make up for it’s lack of features it hast the Terminal button which launches a Git shell in the selected repositories directory and you have the full power of Git at your fingertips.

Git Bash

In the end nothing beats Git Bash. It’s not fancy, it only has one context-menu: Git Bash here.ok this is fine
But don’t forget that „with great power comes great responsibility“, as Spiderman’s uncle used to say when he wrote sudo. You want to throw the remote master away and substitute you own, because you have some good reason to or just want to create chaos?
git push repo +master:new_master
If you want to learn more about Git, we are offering Git trainings too.

Windows Key im Bios

Diese Ansicht hat fast ausgediehnt
Wir setzen bei unseren Lösungen für das Hosting zwar primär auf Open Source und Linux, aber ab und zu wird doch mal ein Windows Server für einen Kunden benötigt. Und da es seit einiger Zeit Änderungen an der Lizenz oder Install-Medium Mitgabe gab, wollen wir mit diesem Post auf die Besonderheiten in diesem Fall eingehen.
In den betreffenden Fällen (meist OEM Server) wird der Key im Bios hinterlegt und von Windows direkt ausgelesen. Gedanklich klingt dies alles gut und erspart sicher auch einigen Aufwand. Wer solch ein System aber besitzt, wird beim ersten Start und der Grundinstallation dann höflich auf die Generierung eines Recover-Mediums hingewiesen. Da man nicht ohne weiteres an den Key heran kommt oder im Fehlerfall keine CD/DVD mehr hat, raten wir jedem Nutzer/Admin dazu, diese Recover-Medien direkt nach der Grundinstallation anzulegen. Einige Vertreiber bestehen sogar darauf, bevor man das System nutzen kann.
Es sollte aber auch nicht vergessen werden, die Medien von Zeit zu Zeit einmal zu erneuern. Anhand der Größe wird oft ein USB Stick genutzt, und diese können ja auch mal Fehler haben. Soviel dazu für heute. Mögen Euch spätere Probleme damit erspart werden.