Seite wählen

NETWAYS Blog

Ansible – Testing roles with Molecule

Ansible is a widely used and a powerful open-source configuration and deployment management tool. It can be used for simple repetitive daily tasks or complex application deployments, therefore Ansible is able to cover mostly any situation.

If used in complex or heterogene environments it is necessary to test the code to reduce time to fix code in production. To test Ansible code it is suggested to use Molecule.

Molecule is a useful tool to run automated tests on Ansible roles or collections. It helps with unit tests to ensure properly working code on different systems. Whether using the role internally or provide it to the public, it is useful to test many cases your role can be used. In addition Molecule is easily integrated into known CI/CD tools, like Github Actions or Gitlab CI/CD.

In this short introduction I’ll try get your first Molecule tests configured and running!

Please make sure you installed Molecule beforehand. On most distributions it’s easily installed via PIP.
The fastest and most common way to test roles would be in container. Due to a version problem with systemd currently it’s not possible to start services over systemd in containers. For this reason you can easily start with a vagrant instance and later migrate to docker or podman easily.


pip install molecule molecule-vagrant

If you have a role you can change into the role directory and create a default scenario.


cd ~/Documents/netways/git/thilo.my_config/
molecule init scenario -r thilo.my_config default
INFO     Initializing new scenario default...
INFO     Initialized scenario in /Users/thilo/Documents/netways/git/thilo.my_config/molecule/default successfully.

Below the molecule folder all scenarios are listed. Edit the default/molecule.yml to add the vagrant options.

Add a dependency file with your collections as with newer Ansible versions only the core is available. If needed you can add sudo privileges to your tests.

molecule/default/molecule.yml


---
dependency:
  name: galaxy
  options:
    requirements-file: collections.yml
driver:
  name: vagrant
platforms:
  - name: instance
    box: bento/centos-7
provisioner:
  name: ansible
verifier:
  name: testinfra
  options:
    sudo: true

The converge.yml is basically the playbook to run on your instance. In the playbook you define which variables should be used or if some pre-tasks should be run.

molecule/default/converge.yml


---
- name: Converge
  hosts: all
  become: true
  tasks:
    - name: "Include thilo.my_config"
      include_role:
        name: "thilo.my_config"

Now you can run your playbook with molecule. If you want to deploy and not delete your instance use converge. Otherwise you can use test, then the instance will be created, tested and destroyed afterwards.


python3 -m molecule converge -s default
or 
python3 -m molecule test -s default

Finally we can define some tests, the right tool is testinfra. Testinfra provides different modules to gather informations and check them if they have specific attributes.

Your scenario creates a tests folder with the following file: molecule/default/tests/test_default.py

In this example I’ll test the resources my role should create.


"""Role testing files using testinfra."""


def test_user(host):
    """Validate created user"""
    u = host.user("thilo")

    assert u.exists

def test_authorized_keys(host):
    """Validate pub key deployment"""
    f = host.file("/home/thilo/.ssh/authorized_keys")

    assert f.exists
    assert f.content_string == "ssh-rsa AAAA[...] \n"

And if we already converged our instance, we can verify these definitions against our deployment.


python3 -m molecule verify
INFO     default scenario test matrix: verify
INFO     Performing prerun with role_name_check=0...
[...]
INFO     Running default > verify
INFO     Executing Testinfra tests found in /Users/thilo/Documents/netways/git/thilo.my_config/molecule/default/tests/...
============================= test session starts ==============================
platform darwin -- Python 3.9.12, pytest-6.2.5, py-1.11.0, pluggy-0.13.1
rootdir: /
plugins: testinfra-6.4.0
collected 2 items

molecule/default/tests/test_default.py ..                                [100%]

============================== 2 passed in 1.79s ===============================
INFO     Verifier completed successfully.

With those easy steps you can easily test your roles for any scenario and your deployments can run without any hassle or at least you will be more relaxed during it 😉

Check out our Blog for more awesome posts and if you need help with Ansible send us a message or sign up for one of our trainings!

Thilo Wening
Thilo Wening
Manager Consulting

Thilo hat bei NETWAYS mit der Ausbildung zum Fachinformatiker, Schwerpunkt Systemadministration begonnen und unterstützt nun nach erfolgreich bestandener Prüfung tatkräftig die Kollegen im Consulting. In seiner Freizeit ist er athletisch in der Senkrechten unterwegs und stählt seine Muskeln beim Bouldern. Als richtiger Profi macht er das natürlich am liebsten in der Natur und geht nur noch in Ausnahmefällen in die Kletterhalle.

Ansible – How to create reusable tasks

Ansible is known for its simplicity, lightweight footprint and flexibility to configure nearly any device in your infrastructure. Therefore it’s used in large scale environments shared between teams or departments. Often tasks could be used in multiple playbooks to combine update routines, setting downtimes at an API or update data at the central asset management.

To use external tasks in Ansible we use the include_task module. This module dynamically includes the tasks from the given file. When used in a specific plays we would assign play specific variables to avoid confusion. For example:


vim tasks/get_ldap_user.yml

- name: get user from ldap
  register: users
  community.general.ldap_search:
    bind_pw: "{{ myplay_ad_bind_pw }}"
    bind_dn: "{{ myplay_ad_bind_dn }}"
    server_uri: "{{ myplay_ad_server }}"
    dn: "{{ myplay_ad_user_dn }}"
    filter: "(&(ObjectClass=user)(objectCategory=person)(mail={{ myplay_usermail }}))"
    scope: children
    attrs:
      - cn
      - mail
      - memberOf
      - distinguishedName

If this task should be used in another playbook to reduce the amount of code or is used again with other conditions or values. Therefore the variables need to be overwritten or if it is another playbook the variables are named wrong.

The solve this problem change the variables to unused generic variables. And assign your own variables in the include_task statement.


vim tasks/get_ldap_user.yml

- name: get user from ldap
  register: users
  community.general.ldap_search:
    bind_pw: "{{ _ad_bind_pw }}"
    bind_dn: "{{ _ad_bind_dn }}"
    server_uri: "{{ _ad_server }}"
    dn: "{{ _ad_user_dn }}"
    filter: "(&(ObjectClass=user)(objectCategory=person)(mail={{ _ad_usermail }}))"
    scope: children
    attrs:
      - cn
      - mail
      - memberOf
      - distinguishedName

The include_task vars parameter provides own variables to the tasks.


vim plays/user_management.yml
[...]
- name: check if user exists in ldap
  include_tasks:
    file: tasks/get_ldap_user.yml
  vars: 
    _ad_bind_pw: "{{ play_ad_pw }}"
    _ad_bind_dn: "{{ play_ad_user }}"
    _ad_server: "{{ play_ad_server }}"
    _ad_user_dn: "OU=users,DC=example,DC=de"
    _ad_usermail: "{{ play_usermail }}"

This can be easily combined with loops, to enhance the reusability of your tasks even more! Checkout this blogpost about looping multiple tasks. Ansible – Loop over multiple tasks

Check out our Blog for more awesome posts and if you need help with Ansible send us a message or sign up for one of our trainings!
Thilo Wening
Thilo Wening
Manager Consulting

Thilo hat bei NETWAYS mit der Ausbildung zum Fachinformatiker, Schwerpunkt Systemadministration begonnen und unterstützt nun nach erfolgreich bestandener Prüfung tatkräftig die Kollegen im Consulting. In seiner Freizeit ist er athletisch in der Senkrechten unterwegs und stählt seine Muskeln beim Bouldern. Als richtiger Profi macht er das natürlich am liebsten in der Natur und geht nur noch in Ausnahmefällen in die Kletterhalle.

Ansible – check your data

The automation and deployment tool Ansible is able to configure applications in multiple environments. This is possible due to variables used in Roles.

Variables are key to make roles reusable, but without proper documentation or descriptions they can get complicated.
If you want to provide different scenarios which are defined by specific variables, you can provide a good documentation and hope it will be seen and understood, otherwise users will get failed runs.

But instead of failed runs with cryptic messages which show that the used variables are wrong, we can easily check beforehand if the variables are set correctly.

The Ansible module ansible.builtin.assert can provide the solution to this problem.

With Ansible when expressions you can define rules and check variables. If the conditions aren’t true the module will fail with a custom message or if true, reward the user with a custom „OK“ message.


- assert:
    that: role_enable_feature is true and role_feature_settings is defined 
    success_msg: The feature is configured correctly and will be managed. 
    fail_msg: To use the feature please configure the variable role_feature_settings, please look at the documentation section X.

With this module it’s easy to guide users when they forgot to use a specific variable or if they use multiple variables which shouldn’t be used together.

If you want to learn more about Ansible, checkout our Ansible Trainings or read more on our blog.

Thilo Wening
Thilo Wening
Manager Consulting

Thilo hat bei NETWAYS mit der Ausbildung zum Fachinformatiker, Schwerpunkt Systemadministration begonnen und unterstützt nun nach erfolgreich bestandener Prüfung tatkräftig die Kollegen im Consulting. In seiner Freizeit ist er athletisch in der Senkrechten unterwegs und stählt seine Muskeln beim Bouldern. Als richtiger Profi macht er das natürlich am liebsten in der Natur und geht nur noch in Ausnahmefällen in die Kletterhalle.

Ansible – AWX|Tower State handling on Workflows

The Ansible Tower or its upstream AWX provides an easy to use GUI to handle Ansible tasks and schedules. Playbooks are configured as templates and as the name suggests, they can be modified to the needs, extended by variables, a survey or tags.

Furthermore those templates can be logically grouped, connected and visualised in Workflows.

The downside to those Workflows, all playbooks affected by this are executed separately and can’t access each others variables. On first glance we maybe only spot that we can define variables for the whole workflow but those are not changeable throughout the flow.

But there is a solution, which is the module set_stats. This module allows to save or accumulate variables and make them available for other playbooks within the workflow.

As an example we could use the monitoring environment when setting downtimes.

workflow

As a downtime is created before a maintenance and should be gone when the maintenance is done. This creates a dependency on the first task, which can be solved as we save the result of the first tasks with the set_stats module.


      - name: schedule downtimes
        icinga2_downtimes:
          state: "{{ downtime_icinga_state | default('present') }}"
          host: ***
          author: "{{ icinga2_downtimes_author | default('ansible_downtime') }}"
          comment: "{{ icinga2_downtimes_comment | default('Downtime scheduled by Ansible') }}"
          duration: "{{ icinga2_downtimes_duration | default(omit) }}"
        register: content
 
      - set_stats:
          data:
            downtime: "{{ content }}"

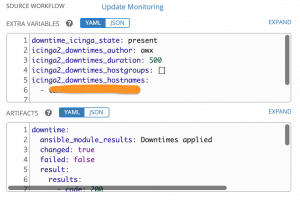
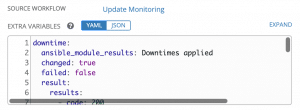
The content of the data will be now available to all playbooks included by the workflow. The variable is also shown as artefacts in the GUI.

artefacts

Keep in mind that the variable will be part of the extra variables for all other playbooks. As covered in the variable precedence it will overwrite any other variable named the same.

With this module you can reorganise your playbooks and connect them in workflows. This allows you to have a more flexible automation than before.

Check out our Blog for more awesome posts and if you need help with Ansible send us a message or sign up for one of our trainings!
Thilo Wening
Thilo Wening
Manager Consulting

Thilo hat bei NETWAYS mit der Ausbildung zum Fachinformatiker, Schwerpunkt Systemadministration begonnen und unterstützt nun nach erfolgreich bestandener Prüfung tatkräftig die Kollegen im Consulting. In seiner Freizeit ist er athletisch in der Senkrechten unterwegs und stählt seine Muskeln beim Bouldern. Als richtiger Profi macht er das natürlich am liebsten in der Natur und geht nur noch in Ausnahmefällen in die Kletterhalle.

Ansible – Loop over multiple tasks

ansible logo

The last time I wrote about Ansible and the possibility to use blocks to group multiple tasks. Which you can read here. Sadly this feature does not work with loop, so there is no clean way to loop over multiple tasks in a play without writing the same loop statement at tasks over and over.

But when we come across the need of tasks which depend on each other, for example, we execute a script with a certain parameter and its result is necessary for the upcoming tasks.

Let’s go through a common example, creating a site consists of a few steps. Creating the directory, creating the vhost and then enabling the site.


- name: "create {{ site }} directory"
  file:
    ensure: directory
    dest: "/var/www/{{ site }}"
    
- name: "create {{ site }}"
  template:
    src: vhost.j2
    dest: "/etc/apache2/sites-available/{{ site }}"
  register: vhost

- name: "enable {{ site }}"
  command: /usr/sbin/a2ensite "{{ site }}"
  register: result
  when: vhost.changed
  changed_when: "'Enabling site' in result.stdout"
  notify: apache_reload

We could use a loop for each tasks and afterwards find the right result for the next task to depend on. But the styleguide will warn you if you try to use Jinja2 syntax in when statements.

So the best solution to this is to use include_tasks, which can include a file with tasks. This task is allowed to have a loop directive and so we can include it multiple times.
Lets see how this would apply to our scenario:


- set_fact:
    sites:
      - default
      - icingaweb2

- name: create vhosts
  include_tasks: create-vhosts.yml
  loop: "{{ sites }}"
  loop_control:
    loop_var: site


In the Result we can see clearly that all tasks are applied for each element in the sites variable.


TASK [set_fact] *********************************************
ok: [localhost]

TASK [create vhosts] ****************************************
included: /Users/twening/Documents/netways/ansible_test20/create-vhosts.yml for localhost => (item=default)
included: /Users/twening/Documents/netways/ansible_test20/create-vhosts.yml for localhost => (item=icingaweb2)

TASK [create default directory] *****************************
ok: [localhost]

TASK [create default] ***************************************
ok: [localhost]

TASK [enable default] ***************************************
ok: [localhost]

TASK [create icingaweb2 directory] **************************
ok: [localhost]

TASK [create icingaweb2] ************************************
ok: [localhost]

TASK [enable icingaweb2] ************************************
ok: [localhost]

PLAY RECAP **************************************************
localhost                  : ok=10   changed=0    unreachable=0    failed=0    skipped=0    rescued=0    ignored=0


Check out our Blog for more awesome posts and if you need help with Ansible send us a message or sign up for one of our trainings!

Thilo Wening
Thilo Wening
Manager Consulting

Thilo hat bei NETWAYS mit der Ausbildung zum Fachinformatiker, Schwerpunkt Systemadministration begonnen und unterstützt nun nach erfolgreich bestandener Prüfung tatkräftig die Kollegen im Consulting. In seiner Freizeit ist er athletisch in der Senkrechten unterwegs und stählt seine Muskeln beim Bouldern. Als richtiger Profi macht er das natürlich am liebsten in der Natur und geht nur noch in Ausnahmefällen in die Kletterhalle.