Seite wählen

NETWAYS Blog

Ein lokales Puppet Development Environment muss her

Wenn man für Puppet Code oder Module entwickeln möchte gibt es verschiedene Ansätze die man nutzen kann:

  • locale Entwicklung, git pushen, in Entwicklungs-Environment auf produktivem Puppetmaster testen
  • lokale Entwicklung, VM mit Puppet Agent, puppet apply nutzen
  • lokale Entwicklung, VMs Puppetmaster/Puppetserver mit Puppetdb Anbindung und einer oder mehrere Clients mit Puppet Agent

Wir wollen uns hier die dritte Möglichkeit anschauen. Als Basis nutzen wir Vagrant, eine Automatisierungsplattform für reproduzierbare Entwicklungsumgebungen.Die Virtualisierung übernimmt in dem Fall  Virtual Box.Vagrant nutzt zum Provisionieren der VMs zwei verschiedene Teile:

  • sogenannte Base Boxes, ein Basisimage, auf dem alles weitere aufsetzt
  • Das sogenannte Vagrantfile das diese Box kopiert, startet und in den gewünschten Zustand überführt.

Das schöne ist Vagrantfiles und Base Boxes (sofern sie selbstgebaut sind) lassen sich wunderbar unter Versionskontrolle stellen und mit mehreren Leuten weiterentwickeln. Und das Ergebnis sieht am Ende bei jedem gleich aus, ohne das man sich ein Bein dafür ausreissen muss.
Wie sieht jetzt eine fertige Entwicklungs Umgebung aus mehreren VMs aus?

  • puppet (Puppetmaster/Puppetserver)
  • puppetdb (PuppetDB API Teil)
  • postgres-puppetdb (PuppetDB Datenbank Backend)
  • puppetclient01 (Puppet Agent, für diesen Node wird Entwickelt)

Um nun die Entwicklungsumgebung aufzubauen checkt man folgendes Git aus und installiert Virtual Box und Vagrant. Jetzt wechselt ins Repository und führt das Script yes_create_a_puppet_development_environment.sh aus. Nun entscheidet man sich für eine Puppetversion, wir nehmen Version 4. Nach ca. 20 Minuten hat man eine laufende Entwicklungsumgebung. Man hat jetzt die Wahl ob man aus dem Vagrant Ordner entwickelt oder die Grundlage in ein neues Git überführt und dieses seperat mountet. Eine Anleitung dazu findet sich in der Readme, genau wie geplante Features und Bugs
Das Git Repository für die Base Boxen findet sich Hier und die Boxen können mit Packer zu Images gebaut werden.
Awesome Dashing dashboards with Icinga 2

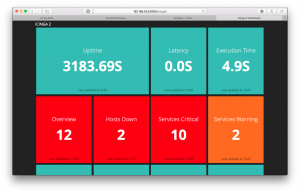
vagrant_dashingWe at NETWAYS are using Dashing on our office dashboards already. This blog post solely targets integrating yet another new API providing data – the Icinga 2 REST API introduced in v2.4.
The following instructions were taken from the existing Vagrant boxes and their puppet manifests to allow faster installation. Doing it manually shouldn’t be an issue though 😉

Requirements

Ensure that the following packages are installed, example for RHEL 7 with EPEL enabled:

package { [ 'rubygems', 'rubygem-bundler', 'ruby-devel', 'openssl', 'gcc-c++', 'make', 'nodejs' ]:
  ensure => 'installed',
  require => Class['epel']
}

Furthermore put a specific /etc/gemrc file which disables installing the documentation for gems – this can take fairly long and is not required by default. Especially not when provisioning a Vagrant box or a Docker container.

dashing-icinga2

I’ve created that project as demo for Icinga Camp Portland with the help of the existing Icinga 1.x dashing scripts from Markus, and a new job for fetching the Icinga 2 status data from its REST API.
Clone the git repository somewhere applicable. You don’t need any webserver for it, Dashing uses Thin to run a simple webserver on its own.

vcsrepo { '/usr/share/dashing-icinga2':
  ensure   => 'present',
  path     => '/usr/share/dashing-icinga2',
  provider => 'git',
  revision => 'master',
  source   => 'https://github.com/Icinga/dashing-icinga2.git',
  force    => true,
  require  => Package['git']
}

Install the dashing gem

The installation might take pretty long when it tries to install the gem’s documentation files. Therefore the flags „–no-rdoc“ and „–no-ri“ ensure that this isn’t done and only the dashing gem and its dependencies are installed into the system.

exec { 'dashing-install':
  path => '/bin:/usr/bin:/sbin:/usr/sbin',
  command => "gem install --no-rdoc --no-ri dashing",
  timeout => 1800
}

Install the gems for dashing-icinga2

Next to the dashing application itself the project requires additional gems, such as a rest client for communicating with the Icinga 2 REST API (check the Gemfile for details). Additionally the bundled gems are not installed into the system’s library but locally into the dashing-icinga2 git clone underneath the „binpaths“ directory (this is to prevent conflicts with rubygem packages in the first place).

exec { 'dashing-bundle-install':
  path => '/bin:/usr/bin:/sbin:/usr/sbin',
  command => "cd /usr/share/dashing-icinga2 && bundle install --path binpaths", # use binpaths to prevent 'ruby bundler: command not found: thin'
  timeout => 1800
}

Dashing startup script

Put a small startup script somewhere executable to (re)start the Dashing application.

file { 'restart-dashing':
  name => '/usr/local/bin/restart-dashing',
  owner => root,
  group => root,
  mode => '0755',
  source => "puppet:////vagrant/files/usr/local/bin/restart-dashing",
}

Dashing runs as Thin process which puts its pid into the local tree. It is merely all about killing the process, removing the pid and then starting dashing again. „-d“ puts the process into daemonize mode (not foreground) as well as „-p 8005“ tells the application where to listen for browsers connecting to. Adjust that for your needs 🙂

#!/bin/bash
cd /usr/share/dashing-icinga2
kill -9 $(cat tmp/pids/thin.pid)
rm -f tmp/pids/thin.pid
/usr/local/bin/dashing start -d -p 8005

Now run Dashing.

exec { 'dashing-start':
  path => '/bin:/usr/bin:/sbin:/usr/sbin',
  command => "/usr/local/bin/restart-dashing",
  require => Service['icinga2'],
}

Configure the Icinga 2 API

The dashing job script just requires read-only access to the /v1/status endpoint. Being lazy I’ve just enabled everything but you should consider limited access 🙂

object ApiUser "dashing" {
  password = "icinga2ondashingr0xx"
  client_cn = NodeName
  permissions = [ "*" ]
}

Configure the Dashing job

There’s a bug in Dashing where job scripts ignore the settings from the config.ru file so there is no other way than to put the Icinga 2 REST API credentials and PKI paths directly into the jobs/icinga2.rb file.

$node_name = Socket.gethostbyname(Socket.gethostname).first
if defined? settings.icinga2_api_nodename
  node_name = settings.icinga2_api_nodename
end
#$api_url_base = "https://192.168.99.100:4665"
$api_url_base = "https://localhost:5665"
if defined? settings.icinga2_api_url
  api_url_base = settings.icinga2_api_url
end
$api_username = "dashing"
if defined? settings.icinga2_api_username
  api_username = settings.icinga2_api_username
end
$api_password = "icinga2ondashingr0xx"
if defined? settings.icinga2_api_password
  api_password = settings.icinga2_api_password
end

Modifications?

You really should know your HTML and Ruby foo before starting to modify the dashboards. The main widget used inside the dashboards/icinga2.erb file is „Simplemon“ defined as data-view attribute. It is already provided inside the dashing-icinga2 repository. data-row and data-col define the location on the dashboard matrix.

    <li data-row="2" data-col="2" data-sizex="1" data-sizey="1">
      <div data-id="icinga-host-down" data-view="Simplemon" data-title="Hosts Down"></div>
    </li>

The important part is the data-id attribute – that’s the value coming from the icinga2 job defined in jobs/icinga2.erb.
The job update interval is set to 1 second in jobs/icinga2.erb:

SCHEDULER.every '1s' do

Connecting to the Icinga 2 REST API, fetching the status data as JSON and then iterating over these dictionaries is pretty straight forward. Additional programming examples can be found inside the Icinga 2 documentation.
Take the „hosts down“ example from above:

hosts_down = status["num_hosts_down"].to_int

Now send the event to dashing by calling the send_event function providing the previosuly extracted value and the demanded color.

  send_event('icinga-host-down', {
   value: hosts_down.to_s,
   color: 'red' })

In case you’re wondering which values are fetched, let dashing run in foreground and print the „status“ dictionary to get an idea about possible keys and values. Or query the Icinga 2 REST API with your own client first.

More?

You can play around with an already pre-installed environment inside the icinga2x Vagrant box and if you’re interested in an automated setup, check the puppet provisioner manifest.
I’m fairly certain that I might improve these puppet manifests after joining the NETWAYS Puppet Practitioner & Architect trainings in February 😉 In case you’ll need your own dashboards and custom modifications, just ask 🙂

Working with git subtree

In case your are organising multiple git repositories and add them into one global, the most obvious choice is to use git submodule. It basically creates a pointer to a specific git commit hash in a remote repository allowing you to clone the repository into a sub directory as module.
Adding submodules is fairly easy, purging them can become cumbersome. When we were working on the Icinga Vagrant boxes one issue was to re-organize the used puppet modules into a central modules directory, as well as purge all local copies and instead use the official git repositories others provided.
Using git submodules turned out to be simple to add, but ugly to manage. Users normally forgot to initialise and update the submodules, and if the developers (me) decided to add/remove modules, it was always in sort of an incompatible check-out state. A fresh git clone –recursive always helped (hi Bernd) but in the end it wasn’t satisfying to work with as users struggled from a simple demo setup with Vagrant.
Looking for alternatives unveiled git subtree as originally suggested by Eric – instead of only adding a module and its commit pointer, you’ll add the repository and all of its commit history into your own git repository, as sub tree with directories and files. This also solves the problem that remote repositories might be gone, unreachable, or anything else hindering the successful clone.
There are several options like to squash the history into a single commit (like one would use git rebase) when adding a new subtree.
 

Add a subtree

When I was working on the Graphite/Grafana integration into the icinga2x box, I’ve just added the Grafana puppet module. The –prefix parameter defines the root directory for the cloned repository, then add the remote url, the branch and let it squash the entire commit history (–squash).
Git doesn’t like uncommitted changes so make sure to stash/commit any existing changes before adding a new subtree.

git subtree add --prefix modules/grafana https://github.com/bfraser/puppet-grafana.git master --squash

This results into two new commits:

commit 0b3e0c215e3021696fce3a37eff3274c174348a8
Merge: 482dc29 6d6fd37
Author: Michael Friedrich <michael.friedrich@netways.de>
Date:   Sat Nov 14 18:47:39 2015 +0100
    Merge commit '6d6fd37ec971314d820c210a50587b9d4ca2124b' as 'modules/grafana'
commit 6d6fd37ec971314d820c210a50587b9d4ca2124b
Author: Michael Friedrich <michael.friedrich@netways.de>
Date:   Sat Nov 14 18:47:39 2015 +0100
    Squashed 'modules/grafana/' content from commit 89fe873
    git-subtree-dir: modules/grafana
    git-subtree-split: 89fe873720a0a4d2d3c4363538b0fa5d71542f41


Update a subtree

In case the remote repository should be updated to incorporate the latest and greatest fixes, you can just use „git subtree pull“. You’ll need the repository url (that is merely why it is documented in README.md inside the Vagrant box project).

$ git subtree pull --prefix modules/grafana https://github.com/bfraser/puppet-grafana.git master --squash
From https://github.com/bfraser/puppet-grafana
 * branch            master     -> FETCH_HEAD
Subtree is already at commit 89fe873720a0a4d2d3c4363538b0fa5d71542f41.


Purge a subtree

Purging a git subtree is also fairly easy – just remove the directory and commit the change. There are no additional config settings to purge unlike known from git submodules.
If you want to get more in-depth insights into Git make sure to check out the new Git training 🙂

Vagrant box playtime

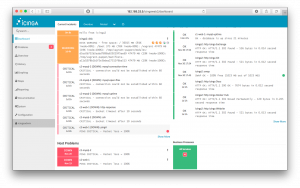
vagrant_icingaweb2_dashboardWhile preparing for the Icinga OSMC booth and talk, the Icinga developers thought about enhancing the existing Vagrant boxes and include more demo cases. While the icinga2x-cluster boxes illustrate the cluster in a master-checker setup, the standalone box icinga2x focuses on a single Icinga 2 instance with Icinga Web 2 and the Icinga 2 API.
Alongside the Icinga 2 API and Icinga Web 2 there are numerous additions to the icinga2x Vagrant box:
 

PNP

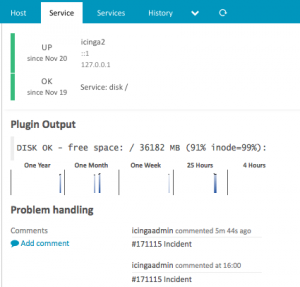
vagrant_icinaweb2_detail_graphs_ttsPNP4Nagios is installed from the EPEL repository. The Icinga 2 Perfdata feature ensures that performance data files are written and the NPCD daemon updates the RRD files. Navigate to the host or service detail in Icinga Web 2 and watch the beautiful graphs. There’s also a menu entry in Icinga Web 2 providing an iframe to the PNP web frontend on its own.
 

GenericTTS

There are demo comments including a ticket id inside the Vagrant box. A simple script feeds them into the Icinga 2 API and the Icinga Web 2 module takes care of parsing the regex and adding a URL for demo purposes.
 

Business Process

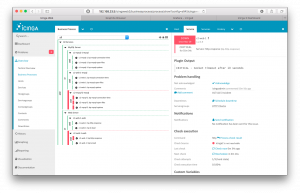
vagrant_icingaweb2_business_processThe box provides 2 use cases for a business process demo: web services and mysql services. In order to check the MySQL database serving DB IDO and Icinga Web 2, the check_mysql_health plugin is used (Icinga 2 v2.4 also provides a CheckCommand inside the ITL <plugins-contrib> already, so integration is a breeze).
These Icinga 2 checks come configured as Business Processes in the Icinga Web 2 module which also allows you to change and simulate certain failure scenarios. You’ll also recognise a dashboard item for the Top Level View allowing you to easily navigate into the BP tree and the host and service details. Pretty cool, eh?
 

NagVis

vagrant_icingaweb2_nagvis
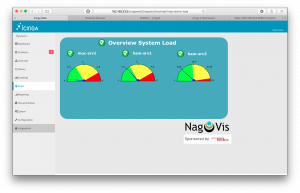
The puppet module installs the latest stable NagVis release and configures the DB IDO as backend. The integration into Icinga Web 2 uses a newly developed module providing a more complete style and integrated authentication for the NagVis backend. Though there are no custom dashboards yet – send in a patch if you have some cool ones 🙂
 

Graphite

vagrant_graphite_web
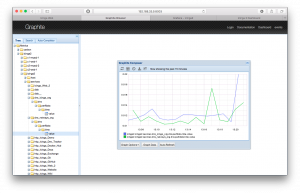
The Graphite backend installation is helped with Puppet modules, the main difference is that Graphite Web VHost is listening on port 8003 by default (80 is reserved for Icinga Web 2). The carbon cache daemon is listening on 2003 where the Icinga 2 Graphite feature is writing the metrics to.


Grafana

vagrant_grafana
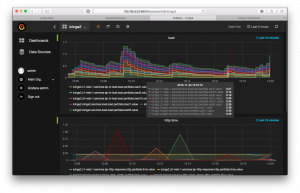
Grafana 2 uses Graphite Web as datasource. It comes preconfigured with the Icinga 2 dashboard providing an overview on load, http, mysql metrics and allows you to easily modify or add new graphs to your dashboard(s).
 

Dashing

vagrant_dashing
There was a Dashing demo using the Icinga 2 API at Icinga Camp Portland though it required some manual installation steps. Since the Vagrant box already enabled the Icinga 2 API, the provisioner now also installs Dashing and the demo files. Note: Installing the Ruby gems required for Dashing might take a while depending on your internet connection. If Dashing is not running, call `restart-dashing`.
 

Playtime!

The icinga2x box requires a little more resources so make sure to have 2 cpu cores and 2 GB RAM available. You’ll need Vagrant and Virtualbox or Parallels installed prior to provision the box.

git clone https://github.com/Icinga/icinga-vagrant.git
cd icinga-vagrant/icinga2x
vagrant up

The initial provisioning takes a while depending on your internet connection.
Each web frontend is available on its own using the host-only network address 192.168.33.5:

Icinga Web 2 http://192.168.33.5/icingaweb2 icingaadmin/icinga
PNP4Nagios http://192.168.33.5/pnp4nagios
Graphite Web http://192.168.33.5:8003
Grafana 2 http://192.168.33.5:8004 admin/admin
Dashing http://192.168.33.5:8005


Vagrant und Parallels

Mittlerweile nutzen wir in fast jedem Projekt Vagrant um unsere Entwicklungsumgebungen zu kontrollieren. Während unter Linux VirtualBox für die virtuellen Maschinen herhalten muss, ist es unter Mac OS X Parallels. VirtualBox würde zwar auch funktionieren, ist aber einfach nicht so performant wie Parallels.
Wenn Vagrant und Parallels bereits installiert sind, ist die Konfiguration und Benutzung von Vagrant mit Parallels ganz einfach:
Parallels Provider für Vagrant installieren:

vagrant plugin install vagrant-parallels

Beispielkonfiguration für Parallels im Vagrantfile:

config.vm.provider :parallels do |p, override|
  # Use a different image for Parallels
  override.vm.box = "parallels-box"
  # Name of the VM in Parallels
  p.name = "Blogpost"
  # Update Parallels Tools automatically
  p.update_guest_tools = true
  # Set power consumption mode to "Better Performance"
  p.optimize_power_consumption = false
  p.memory = 1024
  p.cpus = 2
end

Vagrant mit dem Provider Parallels starten:

vagrant up --provider parallels

Schönen Abend. 🙂

Eric Lippmann
Eric Lippmann
CTO

Eric kam während seines ersten Lehrjahres zu NETWAYS und hat seine Ausbildung bereits 2011 sehr erfolgreich abgeschlossen. Seit Beginn arbeitet er in der Softwareentwicklung und dort an den unterschiedlichen NETWAYS Open Source Lösungen, insbesondere inGraph und im Icinga Team an Icinga Web. Darüber hinaus zeichnet er für viele Kundenentwicklungen in der Finanz- und Automobilbranche verantwortlich.