Seite wählen

NETWAYS Blog

OSMC 2022 | Recap Day 2

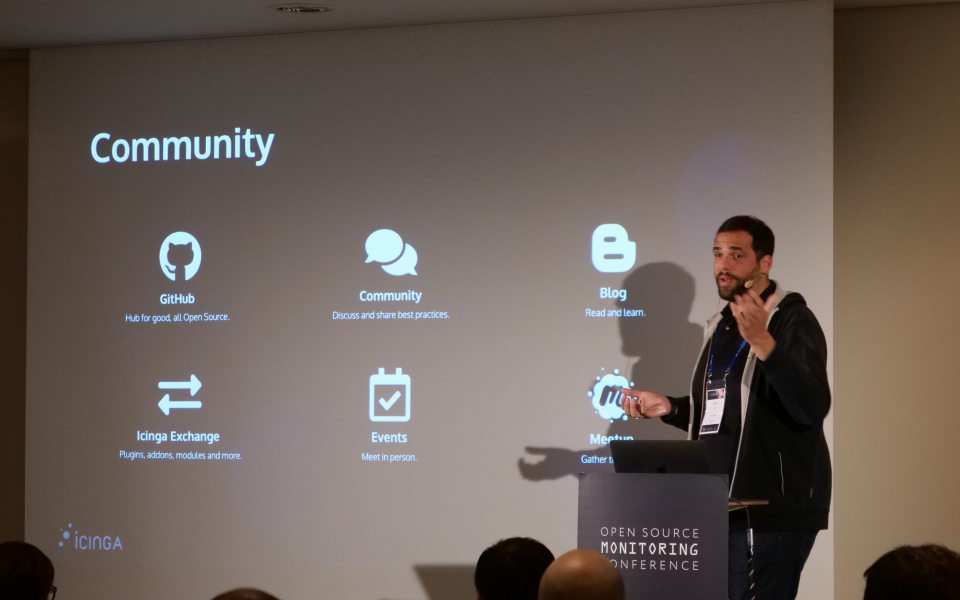
Today I have the pleasure to recap our second OSMC conference day and thus the many great talks of our wonderful speakers! I started my OSMC day with the initial talk of the day after meeting and greeting colleagues and customers alike. OSMC is always a good opportunity not only to catch up with latest developments and monitoring trends but also to catch up with people.

Our CEO Bernd Erk kicked off the day with a dazzling small welcome and introduction also introducing our Gold sponsors. Our two main sponsors SearchGuard and OpenNMS this year had the opportunity to get on stage and say a few words themselves. They greeted us with a warm welcome and invited the attendees over to their booths.

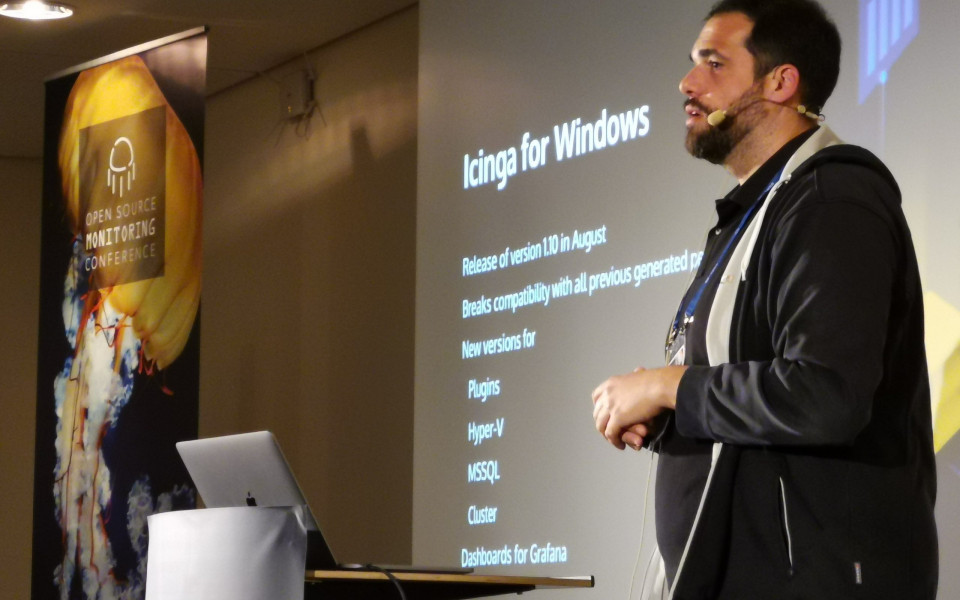
No need for me to change the conference room afterwards, since Christian Stein’s talk about Icinga for Windows, that I wanted to attend, was in the same room. Here i could also say „Hello“ to the team from Telekom – Hans and Lars – Greetings to you two again!

Icinga for Windows in the Monitoring of Madness

Christian from the NETWAYS Sales Department and Icinga Developer presented his Icinga for Windows framework. He shared what’s new and why he came up with the idea of the framework at all. Christian’s initial idea was to give Icinga users a framework for developing their own plugins which they need for their Windows monitoring. He also wanted to provide a daemon which takes care of running it on a schedule. His other goal, to enable customers to do visualization and customize it to a certain degree, he explained with an example from the business process module and a detailed tree view of a check result.

Furthermore, he pointed out the difficulties with the different versions of Powershell and that the same Powershell calls differ in usage between Windows versions. He is creating a baseline for development with Windows 2012 R2 as the lowest version. As a more in-depth example, he explained the legacy behaviour of an Icinga for Windows plugin with different versions. He asked the audience for urgently needed feedback on false positives. I really like Christian’s live demo! But I was also impressed of him being so well prepared that he had the hands-on example explained on a simple slide as well in case the demo wouldn’t have worked. Christian really caught us, I’ve seldomly seen such a focused audience.

Christian closed his talk with with a small preview of the upcoming version 1.10.1 of Icinga for Windows, before he answered a lot of questions from the audience. I then changed the venue and headed over to the other room for the talk from Hila Fish, grabbing a coffee on the way.

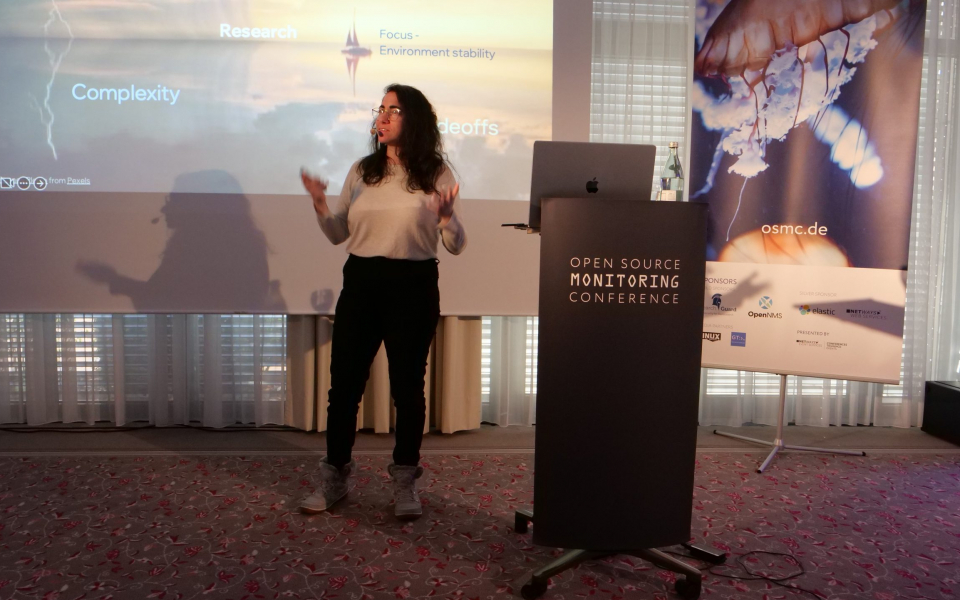
Open Source: Open Choice – A DevOps Guide for OSS Adoption

Hila Fish, Senior DevOps Engineer at Wix, began her talk with her thoughts about the balance between keeping the working environment or breaking it with an update. She took the example of the EOL of the Centos Operating System through RedHat which had no Open Source replacement at that time. She took this as an example for an advantage as well as disadvangates in Open Source.

The possible disadvantages she sees in Open Source are: 1. Security by obscurity (not everybody can read code or interpret it), 2. Prone to abuse (everybody can fork this project or create a malicious one), 3. Compliance, 4. Not always entirely free (even Open Source software comes with costs – support or training), 5. Discontinued product (not maintained anymore).

Also she advised to find out if the OSS Project has a roadmap to check if it will be still free in the future. She pointed out that OSS is still dependend on participation and how you can and should engage in Open Source. Even without writing code there are many ways you can contribute to it – contributions, talks, discussions, donations. Hila ended her talk apologizing for the cough’s. No need to! Get well soon, Hila, from the whole NETWAYS team!

In the break I talked with some colleagues from Austria over a specific problem they encounter with Icinga 2 and how we might tackle it.
Refilled my coffee and then joined the audience for some vSphere input.

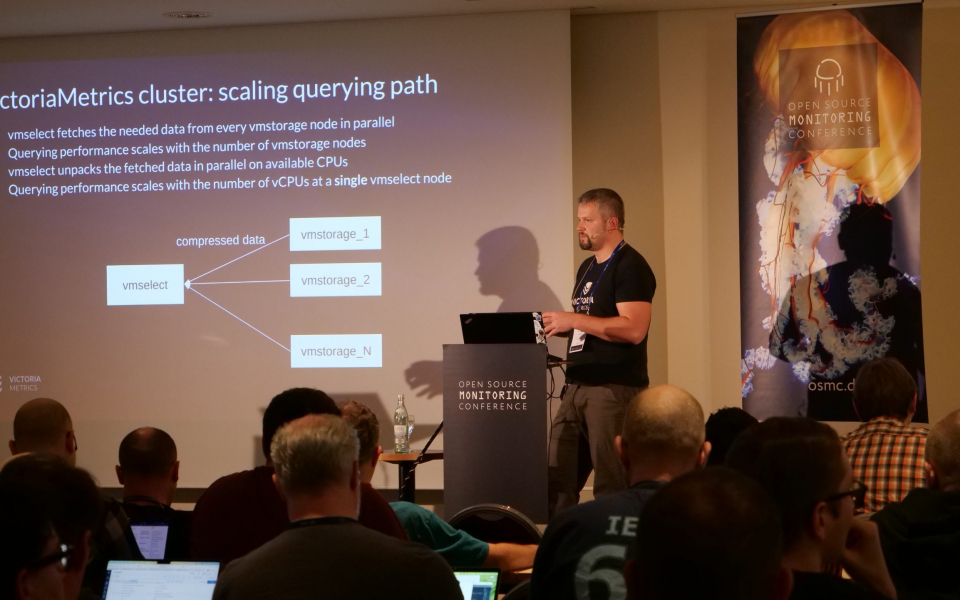
VMware Monitoring with Ease

Thomas Gelf who is working in the NETWAYS Professional Services Department kicked off his talk with some insights in his life: mainly he is making music, playing chess and spending time with his kids. At nights he is coding. He made a small poll with the audience how many people are running VMware in their company and how many are running EXSi without vcenter for development reasons.

He then took us to a small history of the VMware module, where it all started and where we are now in the year 2022. He was especially proud of the GitHub engagement from the users with the vSphere module. Thomas showed us new module interface changes in the actual vSphereDB version and what will come next.

A question of a person in the audience immediately led Thomas to showing his answer in a live demo. In that demo he created a new pull request for the Icinga for Windows framework. That was followed by a demo that showed how to import hosts from a VCenter through the Icinga Director and vSphereDB module integration. After Thomas‘ talk it was time for lunch. I enjoyed a very delicious meal, and said „hello“ to various customers before Bernd rang the bell for the Ignite Talks.

Talks that Ignite New Ideas

Anne Geetha started with a very very fast introduction how to setup and integrating Confluent with Prometheus and Grafana.
It was very nice because of the speedup in the talk during the automated slide switching, so it was very fun to watch as the speakers also had to speed up with their talks. Anne was followed by Daniel Bodky who described his struggles with YAML in „That’s nuts! A proof of concept of Icinga 2 on Kubernetes using Acorn„. Daniel also started right from the bat with a speedy introduction of Acorn and the usage of K8s and Acorn. The third and last one of the Ignite speakers was Philipp Krenn who talked about „How to benchmark – poorly“ , with a great comic strip „benchmarking“ a squid with a house cat. Thanks! Laughed very hard.

My next upcoming talk was from Jonah Kowall.

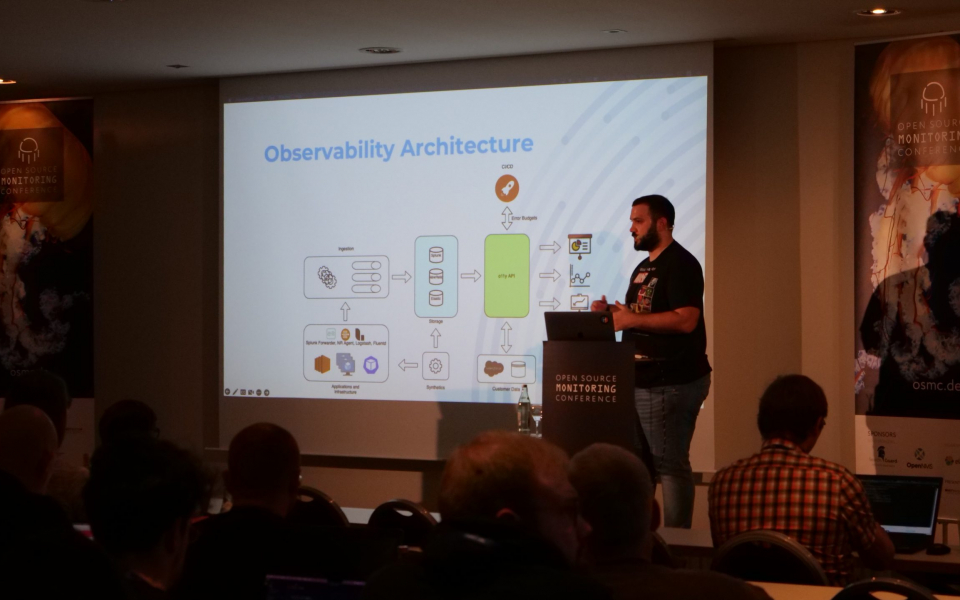
Unifying Observability: Weaving Prometheus, Jaeger, and Open Source Together

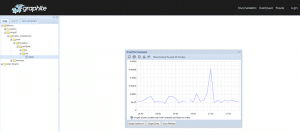
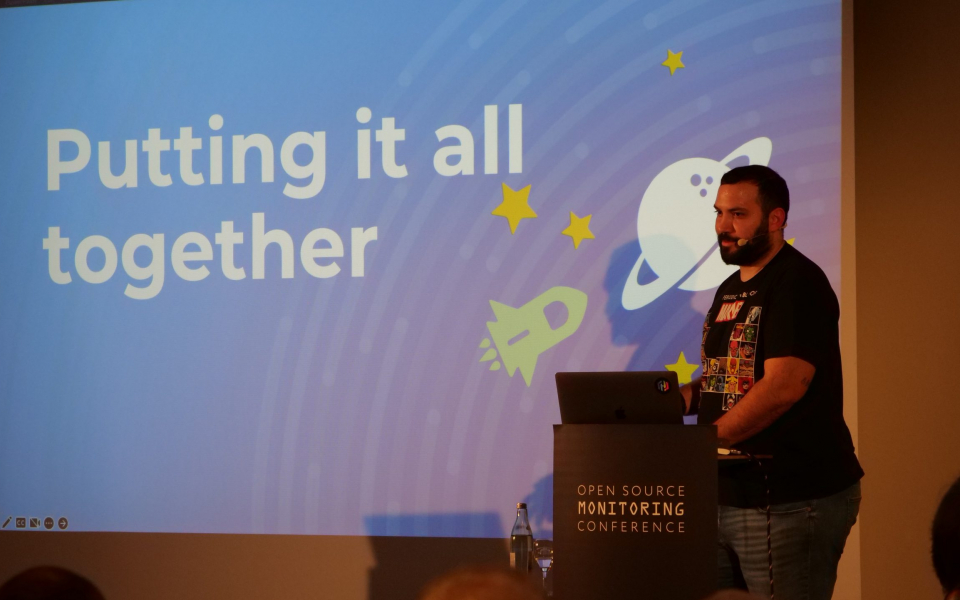
Jonah made an initial point about a big license shift in the Open Source community. Prometheus, Jaeger and Grafana spent some time to make sure that no contamination of source code through those license changes took place. Jonah then talked about OpenSearch and its dashboards (a Kibana fork) and how it is the base for observability. He introduced us to the new feature PromQL support. With this you can query PromQL sources directly from OpenSeach dashboards. Also he showed an early prototype of OpenSearch dashboard plugin for observability before he dived into Jaeger UI and OpenTelemetry. He also advised strongly to follow projects which operate on the Apache 2 License because it is the most unproblematic one. This was in my humble opinion the most important topic today because it touched on the still ongoing licensing issues which occur in the industry at the moment.

The Current State of Icinga

After that I sat down with some customers to discuss and solved some ticket issues and joined afterwards the Current State of Icinga talk of Icinga CEO Bernd Erk. He really tried to convince us to use the Icinga DB in production. Icinga DB has been released this June. Bernd gave us the whole show of annual updates for the Icinga modules. He also dropped some interesting news like the one that the next Icinga Camp Berlin will take place in May 2023. Bernd really tried not to overreach his time schedule, and reached it on spot. Reminding us in the end to gather later to go to the OSMC evening event at the modern event location KORN’S.

As every year Bernd’s presentation is the most entertaining and most interactive with many questions for the audience. You can really tell that he cares for the interaction with the users and customers.

From those talks during the day my personal top three would be Bernd ErkCurrent State of Icinga at place #1, followed by Thomas GelfVMware Monitoring with ease and finally at third place all Ignite Talks which tried to press the most entertaining information in their tiny timeslots. Thanks Anne, Daniel and Philipp for those enteraining bits!

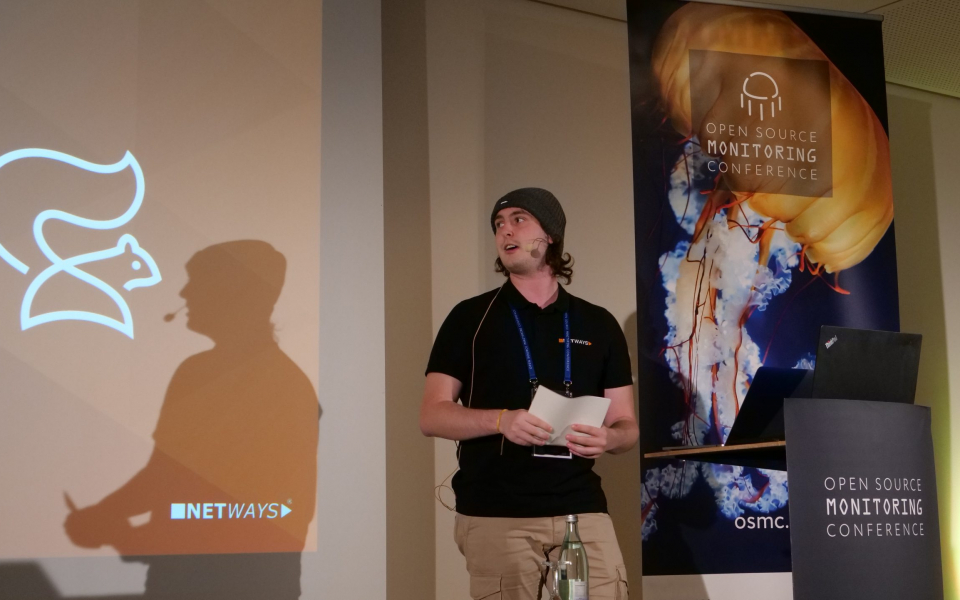
This was my wrap up of the day. I hope you enjoyed it! Now I am looking forward to the evening event and more talks and fun tomorrow! To get a few impressions of the second OSMC day I have prepared a slider with lots of awesome pictures. Enjoy! 😄

With friendly regards, David from the OSMC


David Okon
David Okon
Senior Systems Engineer

Weltenbummler David hat aus Berlin fast den direkten Weg zu uns nach Nürnberg genommen. Bevor er hier anheuerte, gab es einen kleinen Schlenker nach Irland, England, Frankreich und in die Niederlande. Alles nur, damit er sein Know How als IHK Geprüfter DOSenöffner so sehr vertiefen konnte, dass er vom Apple Consultant den Sprung in unser Professional Services-Team wagen konnte. Er ist stolzer Papa eines Sohnemanns und bei uns mit der Mission unterwegs, unsere Kunden zu glücklichen Menschen zu machen.

ServiceNow Data Asset Import mit dem Director

Hallo Liebe Leser dieses Blogs,

nach einer weile der Abwesenheit hab ich heute die Freude ihnen etwas näher bringen zu dürfen.
Da viele unserer Kunden inzwischen auch ServiceNow verwenden und diese auch als Assetmanagement / CMDB verwenden.

Kommt doch die Frage auf wie man gegebenenfalls hier die Daten abfragen kann um Sie in den Director zu importieren um daraus dann Hosts/Services zur Überwachung zu formen.Ich versuche in diesem kleinen Blogpost zumindest einen Ansatzpunkt hierzu aufzuzeigen. Viele verwenden in diesem Fall ja ServiceNow als SaaS, aber es gibt auch Kunden welche es als On Prem einsetzen.
Aber fangen wir an 🙂 in diesem Fall ist der Anlaufpunkt hier die ServiceNow API, wer hätte es gedacht.
In diesem Fall ziehe ich mal die folgende API (Link) zur rate:

Hier wird die ‚cmdb-instance‘ in welcher die CMDB Daten landen dokumentiert. Es ist aber zu bedenken, dass die Instanz natürlich abweichen kann daher ist dies bitte nicht direkt 1:1 zu übernehmen.
Wir feuern per curl gegen die ServiceNow API, die folgende Abfrage… in Hoffnung, dass wir valides JSON zurückerhalten mit all unseren Objekten.


curl -k -s -S -i -u 'servicenow_apiuser:servicenow_apiuserpassword' -H 'Accept: application/json' -H 'X-HTTP-Method-Override: GET' -X POST 'https://instance.servicenow.com/api/now/cmdb/instance/cmdb_ci_linux_server'

und wir erhalten als Antwort das folgende JSON:


{
"result": {
...
"attributes": {
"firewall_status": "Intranet",
"os_address_width": "",
"sys_updated_on": "2020-07-08 11:16:51",
"sys_created_by": "glide.maint",
"warranty_expiration": "",
"ram": "2048",
"cpu_name": "",
"cpu_speed": "2800",
"classification": "Production",
"disk_space": "40",
"dns_domain": "",
"assigned": "2020-01-04 07:00:00",
"floppy": "",
...
"sys_class_name": "cmdb_ci_linux_server",
...
"cpu_count": "1",
...
"os_version": "2.6.9-22.0.1.ELsmp",
"serial_number": "",
"attributes": "",
...
"form_factor": "",
"cpu_core_count": "",
"sys_updated_by": "system",
"sys_created_on": "2008-10-26 17:17:28",
...
"name": "PS LinuxApp01",
"default_gateway": "",
"chassis_type": "",
"sys_id": "3a290cc60a0a0bb400000bdb386af1cf",
"po_number": "",
"checked_in": "",
...
"comments": "",
"os": "Linux Red Hat",
"sys_mod_count": "24",
"monitor": "false",
"model_id": {
"display_value": "Iris 5875",
"link": "https://instance.servicenow.com/api/now/table/cmdb_model/5f5fbcc3c0a8010e00f3b27814f3b96b",
"value": "5f5fbcc3c0a8010e00f3b27814f3b96b"
},
"ip_address": "192.168.178.1",
"duplicate_of": "",
"location": {
"display_value": "Somewhere Street, Someplace, State",
},
"category": "Do not migrate to asset",
"fault_count": "0",
"host_name": "",
"lease_id": ""
},
}

Den Output schreiben wir als Datei raus, so dass wir hier als Beipiel eine Datei haben, mit der wir weiterarbeiten können. Als Beispiel nennen wir diese servicenow.json
(Exclaimer) Ich habe das JSON hier als Beispiel mal extrem zusammengekürzt, damit wir thementechnisch nicht zu weit Abdriften.
Anyway, aber damit lässt sich arbeiten.
Damit wir mit diesem JSON arbeiten können, verwenden wir das Tool ‚jq‘, um relevante key/value Paare herauszufiltern.
Ich habe hier mal den folgenden ‚jq‘ Aufruf verwendet:


jq -j '.result.attributes.os,",",.result.attributes.ip_address,",",.result.attributes.classification,",",.result.attributes.sys_class_name,",",.result.attributes.name,",",.result.attributes.location.display_value,","' servicenow.json

Der somit gewonnene Output ist der folgende, bitte beachtet die ‚,‘ Kommata. Die meisten werden schon ahnen worauf ich gleich hinaus will.
Zurück zu dem nun mit ‚jq‘ aufbereiteteb Output, dieser ist der folgende:


Linux Red Hat,192.168.178.1,Production,cmdb_ci_linux_server,PS LinuxApp01,Somewhere Street, Someplace, State,

Mit etwas Bash Scripting kann man das schön automatisieren und hat am Ende dieses Vorgangs eine CSV Datei, die man hervorragend im Director per Fileshipper weiterverarbeiten kann.
Das mit dem CSV ist eine Geschmacksfrage, denn man kann auch direkt JSON per Fileshipper importieren … ich würde aber dazu tendieren, die Datenmenge durch etwas vorfiltern zu verkleinern. So eine Filterung, wie gesehen, kann auch per ‚jq‘ erfolgen, so dass man ein kleineres JSON File erhält.
Wer wissen möchte, wie man mit dem Director einen Fileshipper-Import durchführt, dem sei der Blogpost meines Kollegen Johannes empfohlen.

Blogpost Director Fileshipper Import

Das war schon mein kleines Intermezzo wie ServiceNow-Data-Assets per Fileshipper in den Director zu importiert sind.
Bis zum nächsten Mal

Mit freundlichem Gruß
David

David Okon
David Okon
Senior Systems Engineer

Weltenbummler David hat aus Berlin fast den direkten Weg zu uns nach Nürnberg genommen. Bevor er hier anheuerte, gab es einen kleinen Schlenker nach Irland, England, Frankreich und in die Niederlande. Alles nur, damit er sein Know How als IHK Geprüfter DOSenöffner so sehr vertiefen konnte, dass er vom Apple Consultant den Sprung in unser Professional Services-Team wagen konnte. Er ist stolzer Papa eines Sohnemanns und bei uns mit der Mission unterwegs, unsere Kunden zu glücklichen Menschen zu machen.

Better Late than never – Graphite-Web installation unter Debian 10 – Part 3

This entry is part 3 of 3 in the series Graphite-Web

Photo by Vita Vilcina on UnsplashHerzlich Willkommen,

wir verliessen unsere tapferen Helden in der letzten Episode bei der schwierigen Aufgabe, Timmy, dem schlauen Collie, die Installation von Graphite-Web via Django zu erklären. Nein, Scherz beiseite. Wir sind nun im finalen Teil unserer dreiteiligen Serie und steigen bei der Finalisierung der Graphite-Web-Installation ein.

Zuletzt hatten wir die Apache2-Konfig, welche wir in die /etc/apache2/sites-available abgelegt hatten, per apachectl -t validiert. Nun folgt die Initialisierung des eigentlichen Graphite-Web Contents.

Zuerst die Initialisierung der Graphitedb.

PYTHONPATH=/opt/graphite/webapp django-admin.py migrate --settings=graphite.settings --run-syncdb

Gefolgt von der Benutzererstellung für das Graphite-Web Frontend.

PYTHONPATH=/opt/graphite/webapp django-admin.py createsuperuser --settings=graphite.settings

Abschließend die Generierung der statischen Website-Elemente.

PYTHONPATH=/opt/graphite/webapp django-admin.py collectstatic --noinput --settings=graphite.settings

Nach der Generierung versorgen wir die Ordner und Dateien mit der korrekten Berechtigung chown -R www-data. /opt/graphite.

Um das Ganze nun in Betrieb zu nehmen, aktivieren wir im Apache2 noch die ssl also auch wsgi-Module. Des Weiteren aktivieren wir auch die graphite-web-ssl.conf

#>a2enmod ssl;
#>a2enmod wsgi;
#>a2ensite graphite-web-ssl.conf;

Somit sind die Voraussetzungen für den Apache2 aktiviert und wir müssen nur noch Sorge dafür tragen, dass die Komponenten bei einem Neustart automatisch initialisiert werden.

systemctl enable apache2 --now
systemctl enable go-carbon.service --now

Nun kann die Website von Graphite-Web unter der angegeben IP-Adresse aufgerufen werden, wo man bei erfolgreichem Ablauf folgende Website sehen sollte:

Aus dem Off hört man eine Stimme von Rodrigo, dem Plantagenbesitzer, der fordert, dass dieser How-to-Guide mit Centos 8.1 wiederholt wird. Ich bedanke mich für die Aufmerksamkeit und freue mich, Sie gern wieder zu einer weiteren Episode ‚curacon fuego del graphite con centos ocho‘ begrüßen zu können.

Servus sagt David!

David Okon
David Okon
Senior Systems Engineer

Weltenbummler David hat aus Berlin fast den direkten Weg zu uns nach Nürnberg genommen. Bevor er hier anheuerte, gab es einen kleinen Schlenker nach Irland, England, Frankreich und in die Niederlande. Alles nur, damit er sein Know How als IHK Geprüfter DOSenöffner so sehr vertiefen konnte, dass er vom Apple Consultant den Sprung in unser Professional Services-Team wagen konnte. Er ist stolzer Papa eines Sohnemanns und bei uns mit der Mission unterwegs, unsere Kunden zu glücklichen Menschen zu machen.

Better Late than never – Graphite-Web-Installation unter Debian 10 – Part 2

This entry is part 2 of 3 in the series Graphite-Web

Willkommen zum zweiten Teil des Blogposts zur Graphite-Web-Installation unter Debian 10.

Wir springen hier direkt an die Stelle, an der wir aufgehört haben, und editieren die storage-schemas.conf unter /etc/go-carbon/

In der Storage-Schemas liegt das default-storage Schema:
Dadurch dass wir Icinga 2 installiert haben und auch dort Graphen generieren möchten, nehmen wir das folgende Schema:

[icinga_internals]
pattern = ^icinga\..*\.(max_check_attempts|reachable|current_attempt|execution_time|latency|state|state_type)
retentions = 5m:7d
[icinga_default]
pattern = ^icinga\.
retentions = 1m:2d,5m:10d,30m:90d,360m:4y

Damit haben wir die Konfiguration vom go-carbon in diesem Beispiel abgeschlossen.

Der nächste Schritt ist nun Whisper selbst und Graphite-Web.
Da das Graphite-Web immer noch Python-lastig ist, müssen wir einen kleinen Schritt im Voraus machen.

Wir definieren die Pfade im Voraus:

export PYTHONPATH="/opt/graphite/lib/:/opt/graphite/webapp/"

Danach erfolgt der allseits beliebte und gefürchtete pip-Aufruf:

pip install --no-binary=:all: https://github.com/graphite-project/whisper/tarball/1.1.6
pip install --no-binary=:all: https://github.com/graphite-project/graphite-web/tarball/1.1.6

Nach der Installation der beiden Komponenten wechseln wir in das /opt/graphite/webapp/graphite Verzeichnis und kopieren die local_settings.py.example, damit wir eine local_settings.py Datei haben, um die Einstellungen zu verändern.

SECRET_KEY = 'Sollte_durch_eine_zufällige_Zeichenkette_ersetzt_werden'
ALLOWED_HOSTS = [ '*' ]  // Für den Testzweck belassen wir es bei dem Asterisk, es sollte aber in Produktivumgebungen ersetzt werden durch die Maschinen welche mit dem Graphite sprechen dürfen.
TIME_ZONE = 'America/Los Angeles' // Die Zeitzone ist selbsterklärend
WHISPER_DIR = '/var/lib/graphite/whisper' // Das Whisper Datei Verzeichnis wo unserer Whisper Dateien liegen

Kleiner Hinweis wegen der Random-Zeichenkette:

Diese kann man mit dem folgenden Kommando erzeugen, wenn man möchte:

openssl rand -base64 32

Nun müssen wir noch den Ordner für unsere Whisper-Dateien anlegen und berechtigen.

mkdir -pv /var/lib/graphite/whisper
chown -Rf carbon. /var/lib/graphite/whisper

Daraufhin kopieren wir das Graphite.wsgi File um, damit es verwendbar ist.

cp /opt/graphite/conf/graphite.wsgi.example /opt/graphite/conf/graphite.wsgi

An dieser Stelle kommt nun die Konfiguration des Apache2. Wenn jemand eine nginx-Konfiguration braucht, bitte ich diese Personen, sich in der Community zu melden, damit wir auswerten können, wie viele Anfragen es gibt, um eine ‚Standard‘-Konfig für die nächste Iteration dieses Blogposts zu erstellen. 🙂

Wir erstellen im Apache-Verzeichnis eine graphite-web-ssl.conf und befüllen diese mit dem folgenden Beispielinhalt. Dieser ist je nach Umgebung anzupassen.

cd /etc/apache2/sites-available/
vi graphite-web-ssl.conf

Inhalt der graphite-web-ssl.conf:

# Enable virtualhosts, perhaps by adding this to your server's config somewhere,
# probably the main httpd.conf
# NameVirtualHost *:443

# This line also needs to be in your server's config.
# LoadModule wsgi_module modules/mod_wsgi.so

# You need to manually edit this file to fit your needs.
# This configuration assumes the default installation prefix
# of /opt/graphite/, if you installed graphite somewhere else
# you will need to change all the occurrences of /opt/graphite/
# in this file to your chosen install location.

LoadModule wsgi_module modules/mod_wsgi.so

# XXX You need to set this up!
# Read http://code.google.com/p/modwsgi/wiki/ConfigurationDirectives#WSGISocketPrefix
# For example, create a directory /var/run/wsgi and use that.
WSGISocketPrefix /var/run/apache2/wsgi

# Base Configuration
ServerName localhost.local
DocumentRoot "/opt/graphite/webapp"

# Log Configuration
ErrorLog /opt/graphite/storage/log/webapp/error.log
CustomLog /opt/graphite/storage/log/webapp/access.log common

# SSL Configuration
SSLEngine On
SSLCertificateFile /etc/pki/tls/private/certificate.crt
SSLCertificateKeyFile /etc/pki/tls/private/certificate.key
SSLCertificateChainFile /etc/pki/tls/private/certificate.pem

# Graphite Related Configuration
# I've found that an equal number of processes & threads tends
# to show the best performance for Graphite (ymmv).
WSGIDaemonProcess graphite processes=5 threads=5 display-name='%{GROUP}' inactivity-timeout=120
WSGIProcessGroup graphite
WSGIApplicationGroup %{GLOBAL}
WSGIImportScript /opt/graphite/conf/graphite.wsgi process-group=graphite application-group=%{GLOBAL}

# XXX You will need to create this file! There is a graphite.wsgi.example
# file in this directory that you can safely use, just copy it to graphite.wgsi
WSGIScriptAlias / /opt/graphite/conf/graphite.wsgi

# XXX To serve static files, either:
# * Install the whitenoise Python package (pip install whitenoise)
# * Collect static files in a directory by running:
# django-admin.py collectstatic --noinput --settings=graphite.settings
# And set an alias to serve static files with Apache:
Alias /static/ /opt/graphite/static/

########################
# URL-prefixed install #
########################
# If using URL_PREFIX in local_settings for URL-prefixed install (that is not located at "/"))
# your WSGIScriptAlias line should look like the following (e.g. URL_PREFX="/graphite"

# WSGIScriptAlias /graphite /srv/graphite-web/conf/graphite.wsgi/graphite
# Alias /graphite/static /opt/graphite/webapp/content
# <Location "/graphite/static/">
# SetHandler None
#

# XXX In order for the django admin site media to work you
# must change @DJANGO_ROOT@ to be the path to your django
# installation, which is probably something like:
# /usr/lib/python2.6/site-packages/django
Alias /media/ "@DJANGO_ROOT@/contrib/admin/media/"

# The graphite.wsgi file has to be accessible by apache. It won't
# be visible to clients because of the DocumentRoot though.

Order deny,allow
Allow from all

= 2.4>
Require all granted

Order deny,allow
Allow from all

= 2.4>
Require all granted

Abschließend überprüfen wir die Konfig mit

apachectl -t

Hier erreichen wir nun den spannenden Teil (Cliffhanger) der Graphite-Web-Installation, und wie zuletzt um den Spannungsbogen zu erhöhen,
bitte ich um etwas Geduld, da im finalen und letzten spannenden Teil dieser Serie wir Graphite-Web initialisieren werden.

Bis dahin mit einem Servus

David

David Okon
David Okon
Senior Systems Engineer

Weltenbummler David hat aus Berlin fast den direkten Weg zu uns nach Nürnberg genommen. Bevor er hier anheuerte, gab es einen kleinen Schlenker nach Irland, England, Frankreich und in die Niederlande. Alles nur, damit er sein Know How als IHK Geprüfter DOSenöffner so sehr vertiefen konnte, dass er vom Apple Consultant den Sprung in unser Professional Services-Team wagen konnte. Er ist stolzer Papa eines Sohnemanns und bei uns mit der Mission unterwegs, unsere Kunden zu glücklichen Menschen zu machen.

Better Late than never – Graphite-Web-Installation unter Debian 10 – Part 1

This entry is part 1 of 3 in the series Graphite-Web

Hallo erstmal und vielen Dank für die Aufmerksamkeit.

Wie ich leider schon viel zu oft angekündigt hatte in den Kommentaren zu meinen häufig angeschauten Artikel Graphite mit Debian 9, reiche ich mit diesem Blogpost mein Versprechen mal ein.

Die Voraussetzungen sind fast die Gleichen wie im alten Blogpost, aber dank unserer Community und deren Mithilfe verfeinert. Ich verweise gern an dieser Stelle auf unsere Community, welche gern & freundlich weiterhilft: Icinga Community.

Nun aber zum Inhalt. Prämisse ist, dass wir eine Icinga2-Installation auf einem frischen Debian 10 (Codename Buster) haben. Die Installation von Icinga2 wird hier explizit nicht erklärt.

Ich liste die Schritte mit auf, werde aber im Gegenzug nur die Graphite-spezifischen Schritte erklären.

Beginnen wir mit der Basisinstallation, sprich den Paketen, welche man braucht und die relativ selbsterklärend sind.

apt-get update -y
apt install gnupg2 vim nagios-plugins-standard nagios-plugins-contrib apache2 -y
wget -O -https://packages.icinga.com/icinga.key | apt-key add -
echo -e "deb http://packages.icinga.com/debian icinga-buster main\ndeb-src http://packages.icinga.com/debian icinga-buster main\n" >> /etc/apt/sources.list
apt-get update -y
apt install python-dev libcairo2-dev libffi-dev build-essential python-pip python-sqlite libapache2-mod-wsgi golang -y
apt install icinga2 -y

Somit wären die ersten Vorarbeiten geleistet. Ab diesem Schritt werden wir für das Graphite-Web nun zuerst Zertifikate generieren.

Wir befinden uns im Jahr 2020. Da sollte zumindest jede sinnvolle Website ein Sicherheitszertifikat mitbringen, vor allem wenn es sich im freien Internet präsentiert. Ich promote hier an dieser Stelle auch nicht „Let’s Encrypt“, weil ich es nicht mag. Es gibt bereits 1001 und mehr Seiten, die bereits darauf eingehen und ich will/möchte mich da nicht einreihen.

Ich halte die händische Zertifikatsgenerierung mal hier als Alternative hoch.

Es fängt unter Debian schon mit der Erstellung der Ordner an.

mkdir -pv /etc/pki/tls/private

Innerhalb des Ordners erzeugen wir uns einen Zertifikatsschlüssel.

openssl genrsa -out certificate.key 2048

Hinweis: 4096 ist ein Wert, der akzeptabel ist. >4096 kann durchaus für die meisten internen Sicherheitsanforderungen nötig sein.

2048 ist hier also nur ein Beispielwert, kein Muss-Wert.

Danach erzeugen wir mit dem Schlüssel eine Signierungsanfrage für ein neues Zertifikat.

openssl req -new -key certificate.key -out certificate.csr -subj "/C=DE/ST=Somewhere1/L=Somewhere/O=Somewhere Company GmbH/OU=IT/CN=localhost.localdomain/emailAddress=admin@somewhere.com"

Wem nun die Frage nach den hier verwendeten Parametern kommt aus einem Ubuntu Guide aus der Community von mir selbst kopiert, hier die Erklärung:


Explanation of the -subj parameters:

Parameter Explanation
/C Country
/ST State
/L Location
/O Organization
/OU Organizational Unit
/CN Common Name
/emailAddress self explanatory

Mit den so erhaltenen Key & CSR erstellen wir nun ein Zertifikat.

openssl x509 -req -days 395 -in certificate.csr -signkey certificate.key -out certificate.crt

Damit hätten wir den Zertifikats-Part an dieser Stelle abgeschlossen. Nun geht es weiter zum Carbon-Teil dieses Blogposts.
Mir war es aktuell auch mit guten ‚Google-Fu‘ nicht möglich, eine aktuellere Quelle zu finden als „https://github.com/lomik/go-carbon/“.
Aktuell ist auf der Graphite-Seite carbon 1.16, aber ich kann nicht sagen, ob beide „feature equal“ sind.

Also wenn jemand etwas Neueres findet, bitte in der Community melden 🙂


wget https://github.com/lomik/go-carbon/releases/download/v0.14.0/go-carbon_0.14.0_amd64.deb
dkpg -i go-carbon_0.14.0_amd64.deb

Nach der Installation des Paketes muss natürlich die Konfiguration angepasst werden.

Also editieren wir die go-carbon.conf & storage-schemas.conf in /etc/go-carbon/.

go-carbon.conf:
max-cpu = 4 (default) // Sollte an die Möglichkeiten des Rechners angepasst werden
data-dir = "/var/lib/graphite/whisper" // Dies ist das Datenverzeichnis wo die Whisper Dateien abgelegt werden hier sollte man bedenken das dies im laufe der Zeit anwächst.
write-strategy = "max" // Um die CPU zu entlasten sollte hier "noop" gewählt werden.
\[udp\] = ... // In diesem Beispiel verwenden wir udp nicht also sollte der gesamte Block auskommentiert werden.
\[tcp\] = ... // Ist in diesem Beispiel unser Transport Protokoll
listen = ":2003" // Ist der Port auf den go-carbon hört sollte um die IP der Maschine ergänzt werden auf der er läuft `beispielhaft` hier "127.0.0.1:2003"

An der Stelle eine kleine Unterbrechung. Es geht weiter in dem folgenden Blogpost:Better Late than never – Graphite-Web-Installation unter Debian 10 – Part 2

Mit freundlichem Gruß

David

David Okon
David Okon
Senior Systems Engineer

Weltenbummler David hat aus Berlin fast den direkten Weg zu uns nach Nürnberg genommen. Bevor er hier anheuerte, gab es einen kleinen Schlenker nach Irland, England, Frankreich und in die Niederlande. Alles nur, damit er sein Know How als IHK Geprüfter DOSenöffner so sehr vertiefen konnte, dass er vom Apple Consultant den Sprung in unser Professional Services-Team wagen konnte. Er ist stolzer Papa eines Sohnemanns und bei uns mit der Mission unterwegs, unsere Kunden zu glücklichen Menschen zu machen.