Ansible und Terraform sind wichtige Werkzeuge im DevOps-Werkzeugkasten und gehören genauso zusammen wie der Hammer und der Schraubendreher.
Was sind Ansible und Terraform überhaupt?
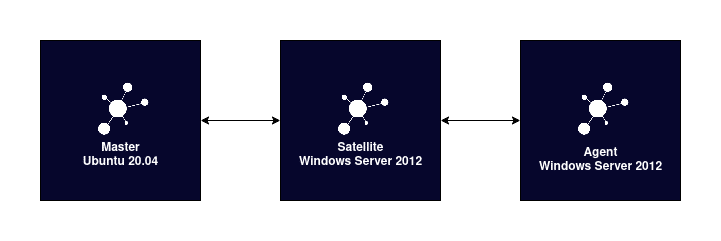
Ansible ist ein Open-Source-Tool zur Automatisierung von IT-Aufgaben wie Konfigurationsmanagement und Anwendungsbereitstellung. Über sogenannte Playbooks können Aufgaben definiert werden, die den gewünschten Zustand von Systemen beschreiben. Es nutzt SSH-Verbindungen (für Linux), um diese Zustände umzusetzen, und erfordert keine Installation von Agenten auf den Zielhosts, was die Einrichtung und Verwendung von Ansible sehr einfach macht.
Im Gegensatz dazu ist Terraform ein Open-Source-Tool, das zur Bereitstellung und Verwaltung von Infrastruktur as Code (IaC) verwendet wird. Entwickler- und Administratorenteams können mit Terraform Infrastrukturressourcen wie VMs, Netzwerkkonfigurationen und Speicherressourcen in verschiedenen Cloud- und On-Premises-Umgebungen definieren, konfigurieren und verwalten. Ähnlich wie Ansible verwendet Terraform einen deklarativen Ansatz, um den gewünschten Zustand der Umgebung zu beschreiben. Anschließend kümmert sich Terraform darum, diesen Zustand zu erstellen, indem die erforderlichen Komponenten bereitgestellt oder aktualisiert werden.
Ähnlich, aber nicht gleich
Es gibt wichtige Unterschiede zwischen den beiden Tools:
- Ansible ist hauptsächlich ein Konfigurationsmanagement-Tool. Es automatisiert die Bereitstellung von Softwareanwendungen, Konfigurationen und Systemzuständen auf vorhandenen Infrastrukturressourcen.
- Terraform hingegen ist spezialisiert auf die Bereitstellung und Verwaltung von Infrastrukturressourcen selbst. Es fokussiert sich darauf Cloud-Dienste zu konfigurieren und zu verwalten.
In anderen Worten: Terraform konzentriert sich auf die Bereitstellung und Verwaltung der Infrastruktur, während Ansible sich um die Konfiguration bestimmter Infrastruktur komponeten kümmert.
Da beide Tools unterschiedliche Bereiche automatisieren, die jedoch eng miteinander verbunden sind, ist es wichtig zu wissen, wie man sie optimal gemeinsam einsetzen kann. Dazu gibt es mehrere Ansätze:
Der Manuelle Weg
Ein bisschen paradox, dass ich die ganze Zeit von Automatisierung rede und jetzt einen Manuellen Weg vorstelle, nicht wahr? Deswegen dient dieser Absatz nur der Vollständigkeit und ich würde jedem raten, sich für einen der anderen Ansätze zu entscheiden.
Dennoch ist es natürlich klar, dass man Terraform und Ansible auch per Hand verheiraten kann. Das sieht dann ungefähr so aus:
- Man schreibt ein Terraform-Skript. Hier habe ich jetzt ein kleines Beispiel (welches ich auch in den anderen Beispielen als Grundlage verwenden werde), um einen virtuellen Server bei [DigitalOcean](https://www.digitalocean.com/) (Droplet) zu erstellen:
terraform {
  required_providers {
    digitalocean = {
    source = "digitalocean/digitalocean"
    version = "~> 2.0"
    }
  }
}

resource "digitalocean_droplet" "test" {
  image = "debian-12-x64"
  name = "manual-way"
  ...
}
Ich habe hier mithilfe des Digital Ocean Providers sehr einfach meinen SSH-Key ablegen können. Die meisten Provider haben entweder ein SSH-Key-Attribut oder bieten Cloud-Init an (Das Attribut heißt dafür oft `user_data`). Es macht Sinn, den SSH-Key, mit dem man dann Ansible verwendet, direkt hier mitzugeben. So spart man sich einen manuellen Schritt. Es macht allerdings nicht so viel Sinn, darüber alle SSH-Keys zu verwalten, da das Ändern dieses Attributes oft zur Neuinstallation des Servers führt.
- Anschließend provisioniert man die Infrastruktur mittels folgenden Terraform-Befehlen –
terraform init,terraform plan,terraform apply. - Nun müssen wir darauf warten, dass die Infrastruktur bereitgestellt ist, Terraform, je nach Provider dauert das unterschiedlich lang.
- Anschließend ermitteln wir die IP-Adresse des Servers. Dies kann entweder über einen Terraform-Output erfolgen oder durch Überprüfen der API oder der Oberfläche von Digital Ocean.
- Mit dieser IP-Adresse erstellen wir nun ein Inventar. Alternativ können wir zuvor einen DNS-Eintrag für diese IP-Adresse setzen oder die IP-Adresse direkt verwenden.
Inventory.yml:
---
all:
  hosts:
    manual-ansible.netways.de:
Ich habe einen DNS-Eintrag verwendet (den kann ich bei einigen DNS-Providern auch per Terraform erstellen!).
Jetzt müssen wir das Playbook schreiben und auf das neue Inventory ausführen.
Playbook.yml:
---
- name: Lets see what we can do
  hosts: all
  tasks:
    - name: Lets run an apt update / apt upgrade task
      ansible.builtin.apt:
        upgrade: True
        update_cache: True
ansible-playbook -i inventory.yml playbook.yml
Output:
PLAY [Lets see what we can do] ****************

TASK [Gathering Facts] ****************
ok: [manual-ansible.netways.de]

TASK [Lets run an apt update / apt upgrade task] ****************
changed: [manual-ansible.netways.de]

PLAY RECAP ****************
manual-ansible.netways.de : ok=2    changed=1    unreachable=0    failed=0    skipped=0    rescued=0    ignored=0
Das war ganz schön viel Arbeit. Aber wie geht es einfacher? Und welche Möglichkeiten gibt es, die beiden Tools zu verheiraten?
Ansible Provider und Terraform Plugin
Mithilfe des Ansible-Providers von Terraform und der cloud.terraform-Collection für Ansible kann man aus Terraform-Skripten dynamische Inventories erstellen.
Dazu erweitern wir das Terraform-Skript aus dem manuellen Beispiel:
terraform {
  required_providers {
    digitalocean = {
      source  = "digitalocean/digitalocean"
      version = "~> 2.0"
    }
    ansible = {
      version = "~> 1.2.0"
      source  = "ansible/ansible"
    }
  }
}

resource "digitalocean_droplet" "web" {
  image  = "debian-12-x64"
  name   = "married-way"
  ...
}

resource "ansible_host" "web" {
  name = digitalocean_droplet.web.ipv4_address
  groups = ["web"]
  variables = {
    ansible_user = "root"
  }
}
Dank des Ansible Providers ist es möglich, die IP-Adresse des gerade erstellten Droplets direkt zu nutzen. Der Ansible-Provider generiert ein Inventar, das es ermöglicht, Hosts direkt Gruppen zuzuweisen und Host-Variablen festzulegen.
Wenn wir nun in die Terraform-State-Datei schauen, sehen wir folgende Resource:
"resources": [
    {
      "mode": "managed",
      "type": "ansible_host",
      "name": "web",
      "provider": "provider[\"registry.terraform.io/ansible/ansible\"]",
      "instances": [
        {
          "schema_version": 0,
          "attributes": {
            "groups": [
              "web"
            ],
            "id": "10.0.0.1",
            "name": "10.0.0.1",
            "variables": {
              "ansible_user": "root"
            }
          },
          ...
        }
      ]
    },
Um das Inventory zu erstellen, müssen wir die cloud.terraform-Collection installieren:
ansible-galaxy collection install cloud.terraform
Dann können wir ein Inventory-File erstellen, das wie folgt aussieht:
---
plugin: cloud.terraform.terraform_provider
project_path: ../terraform
Jetzt können wir uns das Inventory ansehen, das Ansible verwenden würde:
$ ansible-inventory -i inventory.yml --graph --vars
@all:
  |--@ungrouped:
  |--@web:
  |  |--10.0.0.1
  |  |  |--{ansible_user = root}
Jetzt können wir unser Beispiel-Playbook wieder ausführen:
$ ansible-playbook -i inventory.yml playbook.yml

PLAY [Let's see what we can do] ***************

TASK [Gathering Facts] ***************
ok: [10.0.0.1]

TASK [Lets run an apt update / apt upgrade task] ***************
changed: [10.0.0.1]

PLAY RECAP ***************
10.0.0.1               : ok=2    changed=1    unreachable=0    failed=0    skipped=0    rescued=0    ignored=0
Vorteile:
- Wir müssen das Inventory nicht manuell anpassen.
- Wir können die Parameter aus Terraform direkt an das Inventory übergeben.
Nachteile:
- Alle Ressourcen in Terraform müssen doppelt angelegt werden.
- Das Inventory-Plugin unterstützt keine Remote-States, was das Arbeiten im Team erschwert.
Terraform-Modul
Mithilfe des Terraform-Moduls für Ansible kann man Terraform-Skripte ausführen. Das Terraform-Skript in diesem Beispiel ist das gleiche wie im manuellen Beispiel.
Das Playbook:
- name: Deploy a DigitalOcean Droplet
  hosts: localhost
  tasks:
    - name: Deploy
      community.general.terraform:
        project_path: ../terraform
        state: present
$ ansible-playbook playbook.yml
PLAY [Deploy a DigitalOcean Droplet] ***************

TASK [Gathering Facts] ***************
ok: [localhost]

TASK [Deploy] ***************
changed: [localhost]

PLAY RECAP ***************
localhost                  : ok=2    changed=1    unreachable=0    failed=0    skipped=0    rescued=0    ignored=0
Und…. jetzt?
Jetzt ist die VM da, aber wir müssen die VM bzw. den Hostnamen wieder herausfinden. Eigentlich hat dieses Plugin einen anderen Anwendungsfall. Es macht Sinn, es zu verwenden, wenn ich Cloud-Services, die keine weitere Konfiguration durch Ansible benötigen, anlegen und diese in meiner Ansible-Struktur abbilden möchte.
Ein Terraform-Destroy sieht hier übrigens so aus:
- name: Destroy a DigitalOcean Droplet
  hosts: localhost
  tasks:
    - name: Destroy
      community.general.terraform:
        project_path: ../terraform
        state: absent
Fazit
So richtig zufrieden bin ich mit den Möglichkeiten, die es bisher gibt, nicht. Ein dynamisches Inventory aus dem Terraform-State zu erstellen, ist schon mal die richtige Richtung, aber alle Ressourcen doppelt erstellen zu müssen, widerspricht ein wenig der Idee von Terraform. Außerdem sorgt es für eine hohe Korrelation zwischen den beiden Tools. Wenn man jetzt zum Beispiel Ansible durch Puppet austauscht, muss man die gesamte Terraform-Struktur anpassen.
Dennoch sollten wir nicht vergessen, wo die Stärken und Schwächen der einzelnen Tools liegen. Vielleicht hat ja jemand von euch jetzt die Idee, wie wir Ansible und Terraform am besten verheiraten können. Und wenn ihr es geschafft habt, ladet mich doch bitte zur Hochzeit ein!

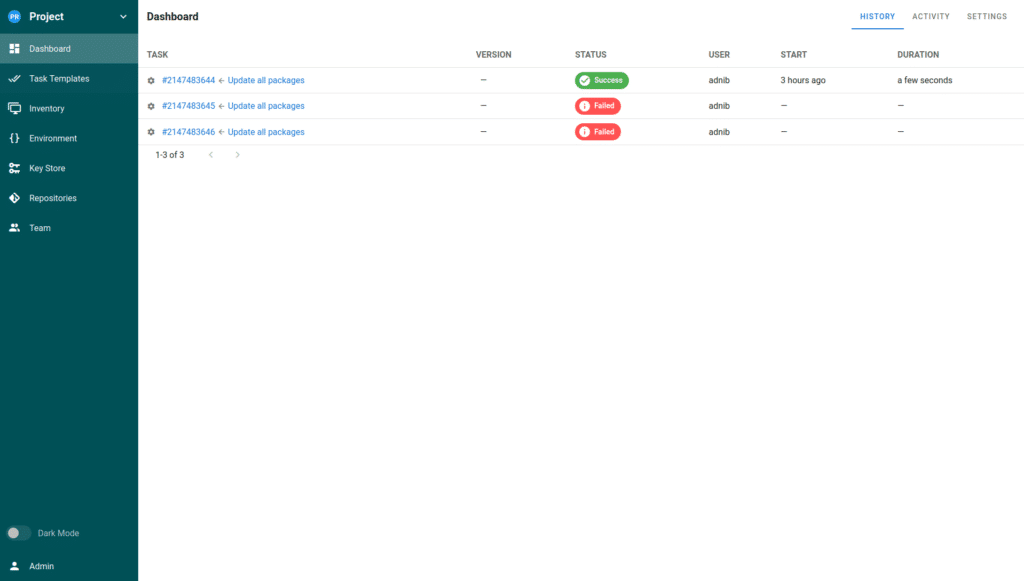 Die von mir gezeigte Oberfläche hat schon ein paar Tasks im Dashboard. Bei einer frischen Installation ist es noch leer, eine Demo-Konfiguration ist also nicht vorhanden. Dafür bietet Semaphore eine