Select Page

NETWAYS Blog

Monitoring Powershell scripts with Icinga 2


The need to to monitor arbitrary Powershell scripts comes up now and then and often there are some workarounds or alternatives, NSClient for example, named. However in order to have something I can link refer people to when the topic comes up again, I’ll try to provide a quick and simple to adapt solution. Keep in mind that this assumes you have Icinga 2 up and running on your Windows host, Powershell installed and are reasonably sane.
First the the check script I used for demonstration purposes in this case, all it does is check whether a process is running and returning OK or CRITICAL based on that.

if ($args.Length -lt 1) {
	Write-Output "Script requires one argument (Process)"
	Exit(3)
}
$proc=$args[0]
$state = Get-Process $proc -ErrorAction SilentlyContinue
if ($state) {
	Write-Output "PROCESS OK '$proc' is running"
	Exit(0)
} else {
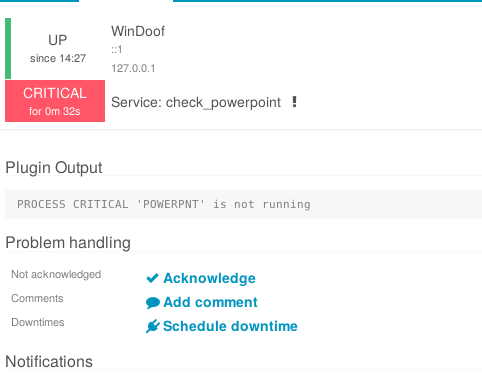
	Write-Output "PROCESS CRITICAL '$proc' is not running"
	Exit(2)
}

Safe it as check_proccess.ps1 somewhere you can find it again. In this case I put next to the other check plugins.
The following are the check_command object and Service apply. And as it turns out it’s not that easy of a task as I thought, it’s mostly Windows fault really… Getting the exit code of a script from Powershell returned to icinga2 required some trickery (credit goes to NSClient for that one). The result is a bit of weird CheckCommand, which can and should be improved.

object CheckCommand "powershell" {
    import "plugin-check-command"
    command = [ "cmd" ]
    arguments = {
        "Weird command" = {
            value = "/c echo $powershell_script$ $powershell_args$ ; exit ($$lastexitcode) | powershell.exe -command -"
            description = "This is needed because powershell would not tell us the exit code otherwise"
            skip_key = true
        }
    }
}
apply Service "check_powerpoint" {
    import "generic-service"
    check_command = "powershell"
    vars.powershell_script = PluginDir + "\check_process.ps1"
    vars.powershell_args = "POWERPNT"
    assign where host.vars.os == "Windows"
}

Der Icinga Buildserver, Version 3

Letztes verbliebene Bild des alten Icinga Jenkins

Der Icinga-Buildserver, erreichbar unter , läuft in dieser Form jetzt etwa ein Jahr. Doch gibt es noch immer ein paar Probleme die mit diesem Setup bestehen: So ist das Hinzufügen neuer Jobs noch etwas umständlich, das provisionieren dauert länger als uns lieb ist und besonders übersichtlich ist die Konfiguration auch nicht. Um diese Probleme anzugehen haben wir uns noch einmal mit Puppet und Jenkins auseinandergesetzt.
Wie vorher verwenden wir ein jenkins puppet-modul, nur diesmal haben wir es mit einem speziellen icinga-jenkins Modul erweitert. Dieses Modul erlaubt es uns spezielle pipeline-jobs mit geringem Konfigurationsaufwand zu erstellen. So ist das unterstehende Beispiel alles was zu konfigurieren ist um eine komplette Pipeline zu erstellen. Selbst der spezielle Umgang mir RPM und Deb ist zu großen Teilen vereinheitlicht und funktioniert für alle Projekte gleich.

icinga_build::pipeline:
  icinga2-snapshot:
    control_repo: https://github.com/Icinga/icinga-packaging.git
    control_branch: snapshot
    matrix_deb:
      'debian-jessie': {}

Die Pipeline erstellt dabei nicht nur einen, sondern gleich vier Jobs: “source”, “binary”, “test” und “publish”. Diese verarbeiten die specfiles, bauen das Paket, testen es und veröffentlichen es auf https://packages.icinga.com
In Produktion ist unser Modul noch nicht, aber um den testen und konfigurieren zu können haben wir Vagrant Boxen gebaut. Mit Hilfe derer bauen wir zur Zeit das icinga-jenkins Modul weiter aus um den bestehenden Buildserver komplett mit den neuen Pipelinejobs abbilden zu können. Wir hoffen unseren Buildprozess damit noch einfacher für Entwickler zu machen und dank der neuen Testsphase für Pakete Problemen in Zukunft besser vorzubeugen zu können

Monitoring Windows with Icinga 2 and NSCP

Monitoring Windows systems can be quite a hassle without the right tools. While Icinga 2 comes with a few check plugins for Windows, sadly they only allow for the most basic monitoring. A tool which is often used for this reason is NSClient++ (NSCP). This little extendable GPL software uses its own checks and even comes with a fully functioning web interface.

The monitoring view of the NSCP Web interface

The monitoring view of the NSCP Web interface


But there are problems with this solution in that it does not work with Icinga 2 out of the box and a few tweaks are necessary. To ease working with these two tools I have written a new Icinga 2 Windows Plugin “check_nscp”, which works like check_nt only that is is less restrictive in its parameters and allows for any NSCP Query to be used.
The following is an example Icinga 2 config which uses check_nscp to monitor the memory used by the Icinga 2 process.

object CheckCommand "nscp-memory-proc" {
    import "nscp-windows"
    vars.nscp_win_query = "check_process"
    vars.nscp_win_args = [
        "process=$nscp_memory_proc_proccess$",
        "warn=working_set>$nscp_memory_proc_warn$",
        "crit=working_set>$nscp_memory_proc_crit$"
   ]
}
apply Service "icinga-mem" {
	import "generic-service"
	check_command = "nscp-memory-proc"
	vars.nscp_memory_proc_proccess = "icinga2.exe"
	vars.nscp_memory_proc_warn = "70m"
	vars.nscp_memory_proc_crit = "200m"
	assign where host.name == NodeName
}

This requires the CheckCommand for check_nscp which will be released together with check_nscp in one if the coming Icinga 2 Versions.

Windows git tools

From time to time I start up my Windows 7 VirtualBox because there is some Windows-specific issue in Icinga 2 to solve. And the first thing to do then is to pull the Icinga 2 repository. The obvious way to do that is to enter git pull in the right directory at least on *nix. But Windows is not Linux and likes to everything a bit more graphical so I put my cynicism aside and tried out two graphical Git tools (again): TortoiseGit and SourceTree

TortoiseGit

9Hl9Izb
I used TortoiseSVN back in 2006/7 (that’s a long time so I might remember things incorrectly) and it was my first interaction with version control, without really knowing what version control was. And I wasn’t particularly fond of it, especially the gigantic right-click-context-menu was of my distaste. Now, nearly ten years later, I’m testing its sister software. And this time I know what I’m doing, I hope.
It all looks familiar but less Windows XPish. The context menus are still there but aren’t as intrusive as I remember them to be but I still get lost configuring it. Where or how do I add a SSH Key again? After that is taken care of it is time to check how it holds up against plain Git in a shell.
Commit, push, pull and fetch all work like expected. Amends are easy to make, bisect works reasonably well but can’t seem to find an equivalent of something like git rebase -i HEAD~3. One thing that stood out was the log, it’s neat. A bit ugly but really neat.
I’m surprised how good TortoiseGit works, yet there seems to be no way to access the full power of Git in case something goes really wrong. All you can do is delete the repository and delete the repo and clone it anew.

SourceTree

I used SourceTree when I first started at NETWAYS in 2014 and abandoned it after a short while. It looked nice but had too many problems to be of much use, so let’s see how it changed in over a year.
sourcetreeThe first change I noticed is the installer, it now requires you to create an Atlassian account. After I gave my E-mail to Atlassian and accepted they may send me whatever information they think might interest me (you don’t get a choice there) I am greeted by a much smoother interface than a year ago, in German because the language default is based on you operating systems locale.
And what else did change? Not much, everything is still where it was. Commit still commits and pull still pulls. When I first used SourceTree I did not get too deep into it’s features but trying out a few of them I found them to be lacking: like TortoiseGit SourceTree is mostly just a fancy wrapper around Git commands, but SourceTree is missing bisect. Compared to TortoiseGit its actions are also hidden a lot deeper inside of sub menus, for example Actions->Resolve Conflicts->Launch External Merge Tool, to start vimdiff. To make up for it’s lack of features it hast the Terminal button which launches a Git shell in the selected repositories directory and you have the full power of Git at your fingertips.

Git Bash

In the end nothing beats Git Bash. It’s not fancy, it only has one context-menu: Git Bash here.ok this is fine
But don’t forget that “with great power comes great responsibility”, as Spiderman’s uncle used to say when he wrote sudo. You want to throw the remote master away and substitute you own, because you have some good reason to or just want to create chaos?
git push repo +master:new_master
If you want to learn more about Git, we are offering Git trainings too.

Das Icinga Buildserver Projekt

Der neue Icinga Buildserver soll die Pakete in Docker Containern die das entsprechende Zielsystem ab um rpm- und deb-Pakete auf gleiche Art betreuen zu können. Das heißt anstatt die eigentlich praktischen Build-Umgebungen wie pbuilder und sbuild werden nicht verwenden.
logo_128
Stattdessen haben wir ein paar lustige Bash-Skripte gebaut die das kompilieren und verpacken übernehmen. Vor allem bei Debian Paketen gibt es dabei ein paar interessante Schritte die sonst von eben genannten Tool übernommen werden. Wie etwa das finden von Abhängigkeiten:

dpkg-checkbuilddeps 2>&1 \
  | grep "^$prefix" \
  | sed -e "s/$prefix//" -e s'/([^)]*)//g' -e 's/ \+| \+/|/g'

Das Ganze ist es dann aber Wert, wenn build.icinga.com erst einmal umgezogen wurde. (Man kann an der Seite sofort merken ob es sich um die alte oder neue handelt)
Das ganze Projekt geht inzwischen schon etwas länger aber nähert sich jetzt seiner Vollendung.