Seite wählen

NETWAYS Blog

Let me introduce: NWS-ID

We’re really excite to share an enhancement with you that puts your NWS Customer Interface experience to a whole new level! NWS-ID – our new core for managing your personal identity and access to nws.netways.de! Even if identity management sounds a bit dull to some, NWS-ID enables us to bring some new features to you. But  what are these new features, you wonder? Okay, let’s get right into it and answer some questions, you might have. First:

What is NWS-ID?

NWS-ID is the future home for your personal user profile and a much desired integration to the current customer interface. Here, you can update your password, configure 2FA and edit your profile data, although we rarely save any of it. The introduction of personal accounts allows us to provide new features to the NWS Customer Interface and the associated products – including a user and group management.

User and Group Management

The first and probably biggest thing is the integration of NWS-ID with our Customer Interface at nws.netways.de, which enables us to release user and group management – a feature many customers requested and that we’re now thrilled to provide. It basically allows you to give your team access to your account and products. The role-based approach allows you to easily create user groups with appropriate permissions and invite your colleagues with their own personal NWS-ID. Thanks to fine-grained authorization settings, you decide who can access and manage your projects or even the whole organisation!

Managing multiple organisations at NWS?

No problem with NWS-ID! It’s never been easier. If you are in charge of managing several organisations at NWS you will love NWS-ID. Your user can be associated with multiple organisations and it’s easy to switch between them with a single click! You no longer have to log in again or use multiple browsers.

When will NWS-ID be available?

We will release NWS-ID in two weeks, on December 14th. All existing accounts will be migrated automatically – if you are a current NWS customer, you will receive an e-mail to renew your password on that day. That’s it! From then on, your NWS-ID is active and the user and group management is available! Don’t forget to enable two-factor authentication! It does not only sound easy, it is easy! We can’t wait for you to use and implement NWS-ID into your everyday life and to see and hear, what benefits it brings to you.

What does the future hold?

With NWS-ID as the new core for our identity management, not only you benefit from this enhancement, but also our products, which you’ll be able to access more effortlessly. Our portfolio will be gradually integrated, which simplifies the access to products and projects for your whole team. SSO is the buzzword here. Give us a little time to implement the integrations and we will of course come back to you as soon as possible!

I hope you are looking forward to the new home for your user profile! I am sure that NWS-ID complements our portfolio well and is the base for simple and good authentication and authorisation. If you have any questions along the way, please feel free to contact us – we’re always there to help answer any open questions.

Achim Ledermüller
Achim Ledermüller
Senior Manager Cloud

Der Exil Regensburger kam 2012 zu NETWAYS, nachdem er dort sein Wirtschaftsinformatik Studium beendet hatte. In der Managed Services Abteilung ist er für den Betrieb und die Weiterentwicklung unserer Cloud-Plattform verantwortlich.

Icinga Web 2 – todsicher.

Nachdem ich mich zuletzt in den Sänften Apples ausgeruht habe, geht es heute zurück ans eingemachte – oder besser gesagt: Back to the Roots! Selbst als alter Icinga Web 2– und Modulentwickler habe ich noch längst nicht alle Vorzüge dieses Feldes beansprucht.
Einer davon ist die Möglichkeit, alles Mögliche für die Authentifizierung herzunehmen. Einzige Voraussetzung: der Webserver muss mitspielen. Manche Authentifizierungsverfahren gelten als sicher, andere nur wenn das Passwort weise gewählt ist… aber zumindest eines ist todsicher: TLS (aka „SSL“) Client-Zertifikate. Die Vorteile liegen auf der Hand:

  • mit der folgenden Anleitung relativ einfach umzusetzen
  • Erstellung unsicherer Zertifikate (analog zu den Passwörtern) nicht möglich
  • keine geheimen/privaten Schlüssel werden während der Authentifizierung übertragen (kann man von Passwörtern nicht behaupten)
  • Unbefugte werden schon vom Webserver „abgefangen“ und kommen gar nicht erst an Icinga Web 2 heran

Na dann riegeln wir mal ab…

Zertifikate erstellen

Sowohl der Webserver als auch jeder Client brauchen je ein TLS-Zertifikat, das von einer der Gegenseite vertrauenswürdigen Zertifizierungsstelle (CA) unterschrieben ist. Diese Unterschriften könnte ich einkaufen oder kostenlos beziehen, aber der Einfachheit halber erstelle ich mir für beide Seiten je eine CA und unterschreibe je ein Zertifikat.
Die Sänfte Apples bieten in der Schlüsselbundverwaltung einen Zertifikatsassistenten, aber auch der eingefleischte Linux-Sysadmin hat mit Openssl ein Umfangreiches Bordmittel zur Verfügung.

Server

Im Gegensatz zum Client müssen Nutzer beider Betriebssysteme darauf achten, dass das Server-Zertifikat über einen sog. „subjectAltName“ verfügt. Sonst staunt man beim Aufbau der Umgebung nicht schlecht: Trotz Vertrauen in die CA und passendem commonName erkennt zumind. Google Chrome das Zertifikat nicht an.
Die hervorgehobenen Stellen müssen höchst wahrscheinlich an die eigene Umgebung angepasst werden – z.B. eine Domäne statt einer IP Adresse und damit auch CN_KIND=DNS.

openssl req -x509 -newkey rsa:4096 -subj '/CN=example com CA - server' -md5 -keyout ca-server.key -out ca-server.crt -nodes
CN_KIND=IP ; CN=172.28.128.3
openssl req -newkey rsa:4096 -subj "/CN=$CN" -keyout server.key -out server.csr -nodes
openssl x509 -req -in server.csr -sha512 -out server.crt -CA ca-server.crt -CAkey ca-server.key -CAcreateserial -extensions SAN -extfile <(printf '[SAN]\nsubjectAltName=%s:%s' "$CN_KIND" "$CN")

Client

Bis auf den hier nicht nötigen „subjectAltName“ – das gleiche in grün.

openssl req -x509 -newkey rsa:4096 -subj '/CN=example com CA - client' -md5 -keyout ca-client.key -out ca-client.crt -nodes
openssl req -newkey rsa:4096 -subj '/CN=Alexander Klimov' -keyout client.key -out client.csr -nodes
openssl x509 -req -in client.csr -sha512 -out client.crt -CA ca-client.crt -CAkey ca-client.key -CAcreateserial

Kleines Easter-Egg am Rande: Es spielt keine Rolle, ob ein Root-CA-Zertifikat mit SHA512, MD5 oder handschriftlich signiert wurde, da es nur auf dessen Vorhandensein im eigenen Schlüsselbund ankommt.

Zertifikate importieren

Ein nicht offizielles Server-CA-Zertifikat und das eigene Client-Zertifikat muss natürlich in den Browser importiert werden. Dafür ist ein kleiner Zwischenschritt nötig:

alexanders-mbp:debian aklimov$ openssl pkcs12 -in client.crt -inkey client.key -export -out client.p12
Enter Export Password:
Verifying - Enter Export Password:
alexanders-mbp:debian aklimov$

„client.p12“ (und evtl. „ca-server.crt“) kann anschließend in den Browser importiert werden. Leider ist ein temporäres Passwort unumgänglich, aber „123456“ o.ä. geht auch.
Wer diesen Schritt verschleppt, fällt bei der Einrichtung von Icinga Web 2 auf die Nase: Entweder beschwert sich der Browser über eine „nicht sichere“ Verbindung oder der Webserver weist die Verbindung ab.

Icinga Web 2 installieren

DIST=$(awk -F"[)(]+" '/VERSION=/ {print $2}' /etc/os-release); \
echo "deb http://packages.icinga.com/debian icinga-${DIST} main" >  /etc/apt/sources.list.d/${DIST}-icinga.list; \
echo "deb-src http://packages.icinga.com/debian icinga-${DIST} main" >>  /etc/apt/sources.list.d/${DIST}-icinga.list
wget -qO - https://packages.icinga.com/icinga.key | apt-key add -
apt update
apt install icingaweb2 -y
cp /vagrant/server.crt /etc/ssl/certs/todsicher.pem
cp /vagrant/server.key /etc/ssl/private/todsicher.pem
cp /vagrant/ca-client.crt /etc/ssl/certs/todsicher-ca.pem
a2dissite 000-default.conf
a2enmod ssl
a2enmod headers
vim /etc/apache2/sites-available/todsicher.conf
a2ensite todsicher.conf
service apache2 restart

Nachdem das Icinga-Repository hinzugefügt wurde, kann auch schon das Paket „icingaweb2“ installiert werden. Dieses bringt den Apache-Webserver mit und integriert sich entsprechend. Darauf hin müssen die Zertifikate installiert und deren Verwendung konfiguriert werden.

/etc/apache2/sites-available/todsicher.conf

<VirtualHost *:80>
	ServerAdmin webmaster@localhost
	DocumentRoot /var/www/html
	ErrorLog ${APACHE_LOG_DIR}/error.log
	CustomLog ${APACHE_LOG_DIR}/access.log combined
	RewriteEngine On
	RewriteRule ^(.*)$ https://%{HTTP_HOST}$1 [R=301,L]
</VirtualHost>
<VirtualHost *:443>
	ServerAdmin webmaster@localhost
	DocumentRoot /var/www/html
	ErrorLog ${APACHE_LOG_DIR}/error.log
	CustomLog ${APACHE_LOG_DIR}/access.log combined
	SSLEngine on
	SSLCertificateFile /etc/ssl/certs/todsicher.pem
	SSLCertificateKeyFile /etc/ssl/private/todsicher.pem
	Header always set Strict-Transport-Security "max-age=2678400"
	SSLCACertificateFile /etc/ssl/certs/todsicher-ca.pem
	SSLVerifyClient require
	SSLVerifyDepth 1
	SSLUserName SSL_CLIENT_S_DN_CN
</VirtualHost>

Sollte jemand auf die Idee kommen, den Server mit HTTP anzusprechen, wird er bedingungslos auf HTTPS umgeleitet – und diese Tat auch nicht wiederholen.
Außerdem wird ein TLS-Client-Zertifikat verlangt, das von entsprechender CA unterschrieben sein muss. Dessen commonName wird im Erfolgsfall als Nutzername behandelt – und genau auf diesen Zug springt Icinga Web 2 auf…

Icinga Web 2 einrichten

Nun greift man via Browser auf Icinga Web 2 zu und richtet es wie gewohnt ein… naja, fast wie gewohnt…


Nachdem der Browser nach dem zu verwendenden Client-Zertifikat gefragt hat, grüßt die Anmeldemaske, die auf den Einrichtungsassistenten verweist. Dieser fordert wie zu erwarten den Einrichtungstoken. Nach dessen Eingabe habe ich ausnahmsweise sämtliche Module deaktiviert, da… dieser Blogpost eh schon viel zu lang ist. (Aber nur die Ruhe, wir haben’s schon fast.)
Nach einer kleinen Anpassung der PHP-Konfiguration und einem darauf folgenden Neustart des Webservers…

root@contrib-stretch:~# perl -pi -e 's~^;date\.timezone =.*?$~date.timezone = Europe/Berlin~' /etc/php/7.0/apache2/php.ini
root@contrib-stretch:~# service apache2 restart

… bestätigt auch schon die erste Ausnahme die Regel: Der Typ des Authentifizierungs-Backends ist auf „Extern“ zu setzen, da dies der Webserver übernimmt. Die folgenden Einstellungen des Backends können bei dem voreingetragenen belassen werden. Wenn alles richtig konfiguriert wurde, schlägt der Assistent den bedienenden Benutzer als Administrator vor. Ab da bleiben nur noch die Formalitäten…

Fazit

Wer auf das Monitoring-System Zugriff hat, hat viel Macht.

Bernd Erk, NETWAYS CEO
Tja Bernd, auf mein Monitoring-System hat kein Unbefugter mehr Zugriff – todsicher.

Alexander Klimov
Alexander Klimov
Senior Developer

Alexander hat 2017 seine Ausbildung zum Developer bei NETWAYS erfolgreich abgeschlossen. Als leidenschaftlicher Programmierer und begeisterter Anhänger der Idee freier Software, hat er sich dabei innerhalb kürzester Zeit in die Herzen seiner Kollegen im Development geschlichen. Wäre nicht ausgerechnet Gandhi sein Vorbild, würde er von dort aus daran arbeiten, seinen geheimen Plan, erst die Abteilung und dann die Weltherrschaft an sich zu reißen, zu realisieren - tut er aber nicht. Stattdessen beschreitet er mit der Arbeit an Icinga Web 2 bei uns friedliche Wege.

SSH authentication with GnuPG and smart cards

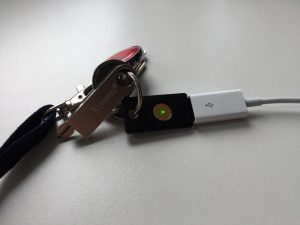
Most system administrators know how to use key-based authentication with SSH. Some of the more obvious benefits include agent forwarding (i.e. being able to use your SSH key on a remote system) and not having to remember passwords. There are, however, a few issues with having your SSH key on a general-purpose computer: Malware can obtain an unencrypted copy of your private SSH key fairly easily. Also, while migrating your key to another system is fairly easy it’s virtually impossible to securely use your SSH key on another untrusted system (e.g. at a customer).
This is where smart cards come in. A smart card stores certificates (such as your SSH key) and provides functionality for operating on those certificates (e.g. using their private key to sign or decrypt data). Smart cards come in various form factors: credit cards, SIM cards, etc. – which commonly require a separate card reader in order to be usable. However, there are also USB devices which implement all the usual smart card features in addition to other security features (e.g. requiring the user to press a key on the device before an authentication request is signed).
One such device is the Yubikey 4 which I’m personally using for SSH authentication.
The first step towards using a new Yubikey for SSH authentication is enabling the OpenPGP applet on it:

$ ykpersonalize -m82

I already had a PGP key, however in order to use it for authentication I had to create an additional subkey for the key usage type „authentication“. Here’s how that can be done:

$ gpg --edit-key --expert info@example.org
gpg (GnuPG) 2.1.23; Copyright (C) 2017 Free Software Foundation, Inc.
This is free software: you are free to change and redistribute it.
There is NO WARRANTY, to the extent permitted by law.
Secret key is available.
sec rsa2048/42330DF1CA650A40
created: 2017-08-24 expires: never usage: SC
trust: ultimate validity: ultimate
ssb rsa2048/56D8D1BBE7E720DB
created: 2017-08-24 expires: never usage: E
[ultimate] (1). NETWAYS Blog <info@example.org>
gpg> addkey
Please select what kind of key you want:
(3) DSA (sign only)
(4) RSA (sign only)
(5) Elgamal (encrypt only)
(6) RSA (encrypt only)
(7) DSA (set your own capabilities)
(8) RSA (set your own capabilities)
(10) ECC (sign only)
(11) ECC (set your own capabilities)
(12) ECC (encrypt only)
(13) Existing key
Your selection? 8
Possible actions for a RSA key: Sign Encrypt Authenticate
Current allowed actions: Sign Encrypt
(S) Toggle the sign capability
(E) Toggle the encrypt capability
(A) Toggle the authenticate capability
(Q) Finished
Your selection? s
Possible actions for a RSA key: Sign Encrypt Authenticate
Current allowed actions: Encrypt
(S) Toggle the sign capability
(E) Toggle the encrypt capability
(A) Toggle the authenticate capability
(Q) Finished
Your selection? e
Possible actions for a RSA key: Sign Encrypt Authenticate
Current allowed actions:
(S) Toggle the sign capability
(E) Toggle the encrypt capability
(A) Toggle the authenticate capability
(Q) Finished
Your selection? a
Possible actions for a RSA key: Sign Encrypt Authenticate
Current allowed actions: Authenticate
(S) Toggle the sign capability
(E) Toggle the encrypt capability
(A) Toggle the authenticate capability
(Q) Finished
Your selection? q
RSA keys may be between 1024 and 4096 bits long.
What keysize do you want? (2048)
Requested keysize is 2048 bits
Please specify how long the key should be valid.
0 = key does not expire
= key expires in n days
w = key expires in n weeks
m = key expires in n months
y = key expires in n years
Key is valid for? (0)
Key does not expire at all
Is this correct? (y/N) y
Really create? (y/N) y
We need to generate a lot of random bytes. It is a good idea to perform
some other action (type on the keyboard, move the mouse, utilize the
disks) during the prime generation; this gives the random number
generator a better chance to gain enough entropy.
sec rsa2048/42330DF1CA650A40
created: 2017-08-24 expires: never usage: SC
trust: ultimate validity: ultimate
ssb rsa2048/56D8D1BBE7E720DB
created: 2017-08-24 expires: never usage: E
ssb rsa2048/5F43E49ED794BDEF
created: 2017-08-24 expires: never usage: A
[ultimate] (1). NETWAYS Blog <info@example.org>
gpg> save

Now that we’ve created a new subkey we can move its private key part to the smart card:

$ gpg --edit-key --expert info@example.org
gpg (GnuPG) 2.1.23; Copyright (C) 2017 Free Software Foundation, Inc.
This is free software: you are free to change and redistribute it.
There is NO WARRANTY, to the extent permitted by law.
Secret key is available.
sec rsa2048/42330DF1CA650A40
created: 2017-08-24 expires: never usage: SC
trust: ultimate validity: ultimate
ssb rsa2048/56D8D1BBE7E720DB
created: 2017-08-24 expires: never usage: E
ssb rsa2048/5F43E49ED794BDEF
created: 2017-08-24 expires: never usage: A
[ultimate] (1). NETWAYS Blog <info@example.org>
gpg> toggle
sec rsa2048/42330DF1CA650A40
created: 2017-08-24 expires: never usage: SC
trust: ultimate validity: ultimate
ssb rsa2048/56D8D1BBE7E720DB
created: 2017-08-24 expires: never usage: E
ssb rsa2048/5F43E49ED794BDEF
created: 2017-08-24 expires: never usage: A
[ultimate] (1). NETWAYS Blog <info@example.org>
gpg> key 2
sec rsa2048/42330DF1CA650A40
created: 2017-08-24 expires: never usage: SC
trust: ultimate validity: ultimate
ssb rsa2048/56D8D1BBE7E720DB
created: 2017-08-24 expires: never usage: E
ssb* rsa2048/5F43E49ED794BDEF
created: 2017-08-24 expires: never usage: A
[ultimate] (1). NETWAYS Blog <info@example.org>
gpg> keytocard
Please select where to store the key:
(3) Authentication key
Your selection? 3
gpg> quit
Save changes? (y/N) y

The Yubikey 4 has three key slots which can be used for storing RSA keys with up to 4096 bits each. This might be an excellent opportunity to also move your signing and encryption key to your smart card – assuming you have an encrypted backup somewhere in case you lose access to your Yubikey.
The last step involves replacing ssh-agent with gpg-agent. This allows your SSH client to use your PGP certificates (including the authentication subkey we just created). In addition to that gpg-agent also supports regular SSH keys which might be useful if you have more than one SSH key and only plan to migrate one of them to your Yubikey:
I had to add the following snippet to my .profile file to start gpg-agent instead of ssh-agent:

[ -f ~/.gpg-agent-info ] && source ~/.gpg-agent-info
if [ -S "${GPG_AGENT_INFO%%:*}" ]; then
  export GPG_AGENT_INFO
  export SSH_AUTH_SOCK
  export SSH_AGENT_PID
else
  eval $(gpg-agent --daemon --write-env-file ~/.gpg-agent-info)
fi

And here’s OpenSSH prompting me for my smart card and PIN:

And that’s how you can literally put your PGP key on your keychain. 🙂