Seite wählen

NETWAYS Blog

The Icinga Config Compiler: An Overview

The Icinga configuration format was designed to be easy to use for novice users while at the same time providing more advanced features to expert users. At first glance it might look like a simple key-value configuration format:

object Host "example.icinga.com" {
	import "generic-host"
	address = "203.0.113.17"
	address6 = "2001:db8::17"
}

However, it features quite a bit of functionality that elevates it to the level of scripting languages: variables, functions, control flow (if, for, while) and a whole lot more.

Icinga’s scripting language is used in several places:

  • configuration files
  • API filter expressions
  • auto-generated files used for keeping track of modified attributes

In this post I’d like to show how some of the config machinery works internally.

The vast majority of the config compiler is contained in the lib/config directory. It weighs in at about 4.5% of the entire code base (3059 out of 68851 lines of code as of July 2018). The compiler is made up of three major parts:

Lexer

The lexer (lib/config/config_lexer.ll, based on flex) takes the configuration source code in text form and breaks it up into tokens. In doing so the lexer recognizes all the basic building blocks that make up the language:

  • keywords (e.g. „object“, „for“, „break“) and operators (e.g. >, ==, in)
  • identifiers
  • literals (numbers, strings, booleans)
  • comments

However, it has no understanding of how these tokens fit together syntactically. For that it forwards them to the parser. All in all the lexer is actually quite boring.

Parser/AST

The parser (lib/config/config_parser.yy, based on GNU Bison) takes the tokens from the lexer and tries to figure out whether they represent a valid program. In order to do so it has production rules which define the language’s syntax. As an example here’s one of those rules for „for“ loops:

| T_FOR '(' identifier T_FOLLOWS identifier T_IN rterm ')'
{
        BeginFlowControlBlock(context, FlowControlContinue | FlowControlBreak, true);
}
rterm_scope_require_side_effect
{
        EndFlowControlBlock(context);
        $$ = new ForExpression(*$3, *$5, std::unique_ptr($7), std::unique_ptr($10), @$);
        delete $3;
        delete $5;
}

Here’s a list of some of the terms used in the production rule example:

Symbol Description
T_FOR Literal text „for“.
identifier A valid identifier
T_FOLLOWS Literal text „=>“.
T_IN Literal text „in“.
BeginFlowControlBlock, EndFlowControlBlock These functions enable the use of certain flow control statements which would otherwise not be allowed in code blocks. In this case the „continue“ and „break“ keywords can be used in the loop’s body.
rterm_scope_require_side_effect A code block for which Icinga can’t prove that the last statement doesn’t modify the program state.
An example for a side-effect-free code block would be { 3 } because Icinga can prove that executing its last statement has no effect.

After matching the lexer tokens against its production rules the parser continues by constructing an abstract syntax tree (AST). The AST is an executable representation of the script’s code. Each node in the tree corresponds to an operation which Icinga can perform (e.g. „multiply two numbers“, „create an object“, „retrieve a variable’s value“). Here’s an example of an AST for the expression „2 + 3 * 5“:

Note how the parser supports operator precedence by placing the AddExpression AST node on top of the MultiplyExpression node.

Icinga’s AST supports a total of 52 different AST node types. Here are some of the more interesting ones:

Node Type Description
ArrayExpression An array definition, e.g. [ varName, "3", true ]. Its interior values are also AST nodes.
BreakpointExpression Spawns the script debugger console if Icinga is started with the -X command-line option.
ImportExpression Corresponds to the import keyword which can be used to import another object or template.
LogicalOrExpression Implements the || operator. This is one of the AST node types which don’t necessarily evaluate all of its interior AST nodes, e.g. for true || func() the function call never happens.
SetExpression This is essentially the = operator in its various forms, e.g. host_name = "localhost"

On their own the AST nodes just describe the semantical structure of the script. They don’t actually do anything in terms of performing any real actions.

VM

Icinga contains a virtual machine (in the language sense) for executing AST expressions (mostly lib/config/expression.cpp and lib/config/vmops.hpp). Given a reference to an AST node – such as root node from the example in the previous section – it attempts to evaluate that node. What that means exactly depends on the kind of AST node:

The LiteralExpression class represents bare values (e.g. strings, numbers and boolean literals). Evaluating a LiteralExpression AST node merely yields the value that is stored inside of that node, i.e. no calculation of any kind takes place. On the other hand, the AddExpression and MultiplyExpression AST nodes each have references to two other AST nodes. These are the operands which are used when asking an AddExpression or MultiplyExpression AST node for „their“ value.

Some AST nodes require additional context in order to run. For example a script function needs a way to access its arguments. The VM provides these – and a way to store local variables for the duration of the script’s execution – through an instance of the StackFrame (lib/base/scriptframe.hpp) class.

Future Considerations

All in all the Icinga scripting language is actually fairly simple – at least when compared to other more sophisticated scripting engines like V8. In particular Icinga does not implement any kind of optimization.
A first step would be to get rid of the AST and implement a bytecode interpreter. This would most likely result in a significant performance boost – because it allows us to use the CPU cache much more effectively than with thousands, if not hundreds of thousands AST nodes scattered around the address space. It would also decrease memory usage both directly and indirectly by avoiding memory fragmentation.
However, for now the config compiler seems to be doing its job just fine and is probably one of the most solid parts of the Icinga codebase.

Spielen in der Cloud

Für unsere firmeninternen LAN-Parties habe ich vor kurzem eine Möglichkeit gesucht, auf unseren MacBook bzw. Azubi-Notebooks Spiele laufen zu lassen. Diese verfügen leider nur über die üblichen, integrierten Intel-Grafikkarten und sind damit nicht für anspruchsvolle Spiele zu gebrauchen.
Bei meiner Suche bin ich auf die Idee gestoßen, die Spiele auf EC2-Instanzen in der Amazon-Cloud laufen zu lassen. Für wenig Geld (ca. 0,50€/Stunde) lassen sich VMs mit einer NVIDIA GRID K520-Grafikkarte starten.

Zusammen mit Steam In-Home-Streaming und einem Layer-2-Tunnel (damit Steam denkt, dass die VM im gleichen LAN-Segment läuft) lässt sich daraus der perfekte Spielerechner basteln. Dass ich nicht der erste bin, der diesen Plan hatte, zeigen diverse Anleitungen, die einige Details bei der Installation besser erklären, als ich es hier in aller Kürze könnte.
Ich habe das ganze natürlich ausführlich mit Guild Wars 2 getestet (nicht während meiner Arbeitszeit ?) und mir ist nur vereinzelt aufgefallen, dass das Spiel ja gar nicht lokal läuft: Die Steuerung ist absolut verzögerungsfrei und nur bei schnellen Kameraschwenks sieht man für ein paar Millisekunden Kompressionsartefakte.

Userspace-Tracing mit DTrace

Als Entwickler habe ich oft das Problem, dass mir auf Produktionssystemen die Sichtbarkeit auf Programminterna fehlt: Wie viele Requests verarbeitet mein Programm gerade pro Sekunde? Ist die Queue aktuell voll?
Nun kann man anfangen, an allen möglichen Stellen Logeinträge zu schreiben. Allerdings wirken sich diese zum einen auf die Performance aus (nichts ist gratis, auch und gerade das Schreiben von Logs nicht) und zum anderen ist es extrem mühsam, die so gesammelten Daten im Anschluss in ein annehmbares Format zu bringen, um wirklich eine Aussage über die Performance treffen zu können. Andere Tools wie rr und valgrind sind dagegen zum Debuggen sehr praktisch, verlangsamen die ausgeführten Programme jedoch extrem, weswegen sie sich nicht für den produktiven Einsatz eignen.
Einen Lösungsansatz bieten hier Tracing-Frameworks. Hierzu liefert das eigene Programm bei bestimmten Ereignissen (z.B. wenn ein Request verarbeitet wurde) strukturierte Daten (z.B. Länge des Requests, Anzahl der Ergebnisse, o.ä.). Diese werden vom Tracing-Framework gesammelt und aufbereitet. Ein solches Framework ist DTrace. Es wurde ursprünglich von Sun Microsystems für Solaris entwickelt, ist allerdings auch für macOS verfügbar. Zudem bietet SystemTap unter Linux Kompatibilität für Teile der DTrace-Infrastruktur.
DTrace erlaubt es, interessante Stellen in den eigenen Programmen mit Probes auszustatten:

provider icinga {
	probe wq__full(void *wq);
	probe wq__starved(void *wq);
	probe wq__task__interleaved(void *wq);
	probe wq__task__begin(void *wq);
	probe wq__task__end(void *wq);
};

Zur Laufzeit des Programms sind diese Probes zunächst nicht aktiv und verursachen keinen Overhead. Dies erlaubt es, Probes auch in Release-Versionen mit auszuliefern, was das Analysieren von Performance-Problemen erleichtert, da nicht erst spezielle Pakete installiert werden müssen.
DTrace kann Probes je nach Bedarf aktivieren und auch wieder deaktivieren, auch wenn das Programm bereits läuft. Auch können Ereignisse mit DTrace-Scripts direkt in Relation zueinander gesetzt werden, um z.B. die Dauer zwischen zwei Ereignissen zu erfassen:

$ cat wq.d
icinga$target:::wq-task-begin
{
	self->ts = timestamp;
}
icinga$target:::wq-task-end
{
	@ = quantize(timestamp - self->ts);
}

Dieses Script können wir nun verwenden, um eine bereits laufende Icinga-Instanz zu analysieren:

$ ps ax | grep icinga2
56711 s003  R+     0:00.00 grep icinga2
56685 s006  R+     0:05.68 /Users/gunnar/i2/lib/icinga2/sbin/icinga2 daemon
56705 s006  S+     0:00.05 /Users/gunnar/i2/lib/icinga2/sbin/icinga2 daemon
$ sudo dtrace -s wq.d -p 56685
dtrace: system integrity protection is on, some features will not be available
dtrace: script 'wq.d' matched 2 probes
^C
           value  ------------- Distribution ------------- count
          524288 |                                         0
         1048576 |@                                        5
         2097152 |@@@@@@@@@@@@@@@@@@@@@@@@@@@@@@@@@@       160
         4194304 |@@@                                      14
         8388608 |                                         1
        16777216 |                                         0
        33554432 |                                         0
        67108864 |                                         0
       134217728 |                                         0
       268435456 |                                         1
       536870912 |@                                        3
      1073741824 |                                         0
      2147483648 |                                         0
      4294967296 |                                         0
      8589934592 |                                         0
     17179869184 |                                         0
     34359738368 |                                         0
     68719476736 |                                         0
    137438953472 |@                                        4
    274877906944 |                                         0
$

Mein Ziel ist es, in absehbarer Zeit in Icinga 2 offiziell Support für DTrace einzubauen. Mal schauen, was sich damit dann alles rausfinden lässt. 🙂

Über Microservices und Jabberbots

Bei unserer Unternehmensfortbildung am 30. November und 1. Dezember haben wir in kleineren Gruppen an diversen Projekten gearbeitet. Eines der Themen war die Integration unserer intern verwendeten Services (Wiki, Ticketsystem, u.ä.) in einen Jabberbot. Davon versprechen wir uns, dass häufig genutzte Tasks automatisiert werden können, wie etwa:

  • Nach Kunden im CRM suchen, um diese beispielsweise schnell und einfach anrufen zu können.
  • Im Ticketsystem Tickets kommentieren oder schließen.
  • In der Zeiterfassung Zeit auf bestimmte Projekte buchen.

Dass sich über Jabber nicht alle Features der darunter liegenden Tools abbilden lassen, war uns dabei von Anfang an bewusst und sollte auch gar nicht Ziel des Bots sein.
Eine weitere grundsätzliche Herausforderung besteht darin, die abgefragten Informationen so aufzubereiten, dass sie vom Benutzer verwendet werden können. Im Gegensatz zu einer Webseite bietet Jabber nur sehr eingeschränkte Möglichkeiten, Text zu formatieren und zwischen Informationen zu verlinken. Unser Bot wird sich daher auf das wesentliche beschränken müssen. Bei Tickets können so etwa nur die Betreffzeile und einige weitere ausgewählte Attribute angezeigt werden. Wer mehr braucht, gelangt über einen Link zum vollständigen Ticket – im Browser.
Um auch anderen Mitarbeitern die Möglichkeit zu geben, eigene Services in den Bot zu integrieren, haben wir uns nach einer kleinen Architekturphase dazu entschieden, dass der Bot an sich keinerlei eigene Funktionalität beinhaltet, sondern alle seine Befehle an eine Reihe von Microservices delegiert. Diese sollen über eine REST-Schnittstelle angesprochen werden und ihren eigenen Funktionsumfang selbst beschreiben können. Dies ermöglicht dem Bot, beliebige Services zu integrieren, ohne diese im Vorfeld kennen zu müssen. Unsere Benutzer sollen die Möglichkeit haben, für ihren Account eigene Services anhand einer HTTP-URL hinzuzufügen. Der Vorteil hiervon ist, dass jeder spielerisch eigene Services entwickeln und aktivieren kann, ohne über unser Sysadmin-Team Module beim Bot neuladen lassen zu müssen. Auch können Programmierfehler (sleep() im Modul, o.ä.) nicht die Stabilität des Bots gefährden.
Soweit unsere aktuelle Idee. Es gibt zwar auch schon einen sehr frühen Prototypen (auf Basis von errbot), der auch bereits externe Services verwenden kann. Allerdings fehlen auch noch viele Sachen, allen voran natürlich tatsächliche Services für viele unserer Tools. Ich bin aber zuversichtlich, dass wir mit vergleichsweise wenig Entwicklungsaufwand einen einsatzfähigen Bot basteln können. Hoffentlich gibt es dazu dann einmal ein Update inkl. Sourcecode, wenn dies soweit ist.

SSH authentication with GnuPG and smart cards

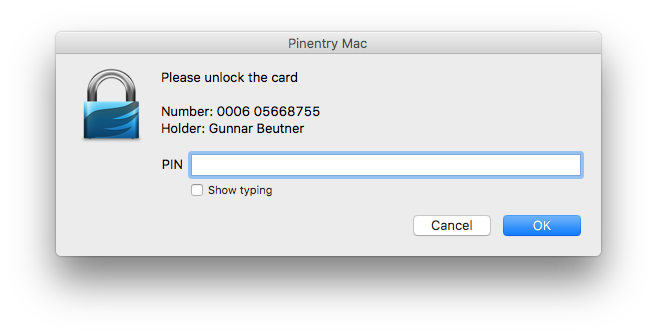
Most system administrators know how to use key-based authentication with SSH. Some of the more obvious benefits include agent forwarding (i.e. being able to use your SSH key on a remote system) and not having to remember passwords. There are, however, a few issues with having your SSH key on a general-purpose computer: Malware can obtain an unencrypted copy of your private SSH key fairly easily. Also, while migrating your key to another system is fairly easy it’s virtually impossible to securely use your SSH key on another untrusted system (e.g. at a customer).
This is where smart cards come in. A smart card stores certificates (such as your SSH key) and provides functionality for operating on those certificates (e.g. using their private key to sign or decrypt data). Smart cards come in various form factors: credit cards, SIM cards, etc. – which commonly require a separate card reader in order to be usable. However, there are also USB devices which implement all the usual smart card features in addition to other security features (e.g. requiring the user to press a key on the device before an authentication request is signed).
One such device is the Yubikey 4 which I’m personally using for SSH authentication.
The first step towards using a new Yubikey for SSH authentication is enabling the OpenPGP applet on it:

$ ykpersonalize -m82

I already had a PGP key, however in order to use it for authentication I had to create an additional subkey for the key usage type „authentication“. Here’s how that can be done:

$ gpg --edit-key --expert info@example.org
gpg (GnuPG) 2.1.23; Copyright (C) 2017 Free Software Foundation, Inc.
This is free software: you are free to change and redistribute it.
There is NO WARRANTY, to the extent permitted by law.
Secret key is available.
sec rsa2048/42330DF1CA650A40
created: 2017-08-24 expires: never usage: SC
trust: ultimate validity: ultimate
ssb rsa2048/56D8D1BBE7E720DB
created: 2017-08-24 expires: never usage: E
[ultimate] (1). NETWAYS Blog <info@example.org>
gpg> addkey
Please select what kind of key you want:
(3) DSA (sign only)
(4) RSA (sign only)
(5) Elgamal (encrypt only)
(6) RSA (encrypt only)
(7) DSA (set your own capabilities)
(8) RSA (set your own capabilities)
(10) ECC (sign only)
(11) ECC (set your own capabilities)
(12) ECC (encrypt only)
(13) Existing key
Your selection? 8
Possible actions for a RSA key: Sign Encrypt Authenticate
Current allowed actions: Sign Encrypt
(S) Toggle the sign capability
(E) Toggle the encrypt capability
(A) Toggle the authenticate capability
(Q) Finished
Your selection? s
Possible actions for a RSA key: Sign Encrypt Authenticate
Current allowed actions: Encrypt
(S) Toggle the sign capability
(E) Toggle the encrypt capability
(A) Toggle the authenticate capability
(Q) Finished
Your selection? e
Possible actions for a RSA key: Sign Encrypt Authenticate
Current allowed actions:
(S) Toggle the sign capability
(E) Toggle the encrypt capability
(A) Toggle the authenticate capability
(Q) Finished
Your selection? a
Possible actions for a RSA key: Sign Encrypt Authenticate
Current allowed actions: Authenticate
(S) Toggle the sign capability
(E) Toggle the encrypt capability
(A) Toggle the authenticate capability
(Q) Finished
Your selection? q
RSA keys may be between 1024 and 4096 bits long.
What keysize do you want? (2048)
Requested keysize is 2048 bits
Please specify how long the key should be valid.
0 = key does not expire
= key expires in n days
w = key expires in n weeks
m = key expires in n months
y = key expires in n years
Key is valid for? (0)
Key does not expire at all
Is this correct? (y/N) y
Really create? (y/N) y
We need to generate a lot of random bytes. It is a good idea to perform
some other action (type on the keyboard, move the mouse, utilize the
disks) during the prime generation; this gives the random number
generator a better chance to gain enough entropy.
sec rsa2048/42330DF1CA650A40
created: 2017-08-24 expires: never usage: SC
trust: ultimate validity: ultimate
ssb rsa2048/56D8D1BBE7E720DB
created: 2017-08-24 expires: never usage: E
ssb rsa2048/5F43E49ED794BDEF
created: 2017-08-24 expires: never usage: A
[ultimate] (1). NETWAYS Blog <info@example.org>
gpg> save

Now that we’ve created a new subkey we can move its private key part to the smart card:

$ gpg --edit-key --expert info@example.org
gpg (GnuPG) 2.1.23; Copyright (C) 2017 Free Software Foundation, Inc.
This is free software: you are free to change and redistribute it.
There is NO WARRANTY, to the extent permitted by law.
Secret key is available.
sec rsa2048/42330DF1CA650A40
created: 2017-08-24 expires: never usage: SC
trust: ultimate validity: ultimate
ssb rsa2048/56D8D1BBE7E720DB
created: 2017-08-24 expires: never usage: E
ssb rsa2048/5F43E49ED794BDEF
created: 2017-08-24 expires: never usage: A
[ultimate] (1). NETWAYS Blog <info@example.org>
gpg> toggle
sec rsa2048/42330DF1CA650A40
created: 2017-08-24 expires: never usage: SC
trust: ultimate validity: ultimate
ssb rsa2048/56D8D1BBE7E720DB
created: 2017-08-24 expires: never usage: E
ssb rsa2048/5F43E49ED794BDEF
created: 2017-08-24 expires: never usage: A
[ultimate] (1). NETWAYS Blog <info@example.org>
gpg> key 2
sec rsa2048/42330DF1CA650A40
created: 2017-08-24 expires: never usage: SC
trust: ultimate validity: ultimate
ssb rsa2048/56D8D1BBE7E720DB
created: 2017-08-24 expires: never usage: E
ssb* rsa2048/5F43E49ED794BDEF
created: 2017-08-24 expires: never usage: A
[ultimate] (1). NETWAYS Blog <info@example.org>
gpg> keytocard
Please select where to store the key:
(3) Authentication key
Your selection? 3
gpg> quit
Save changes? (y/N) y

The Yubikey 4 has three key slots which can be used for storing RSA keys with up to 4096 bits each. This might be an excellent opportunity to also move your signing and encryption key to your smart card – assuming you have an encrypted backup somewhere in case you lose access to your Yubikey.
The last step involves replacing ssh-agent with gpg-agent. This allows your SSH client to use your PGP certificates (including the authentication subkey we just created). In addition to that gpg-agent also supports regular SSH keys which might be useful if you have more than one SSH key and only plan to migrate one of them to your Yubikey:
I had to add the following snippet to my .profile file to start gpg-agent instead of ssh-agent:

[ -f ~/.gpg-agent-info ] && source ~/.gpg-agent-info
if [ -S "${GPG_AGENT_INFO%%:*}" ]; then
  export GPG_AGENT_INFO
  export SSH_AUTH_SOCK
  export SSH_AGENT_PID
else
  eval $(gpg-agent --daemon --write-env-file ~/.gpg-agent-info)
fi

And here’s OpenSSH prompting me for my smart card and PIN:

And that’s how you can literally put your PGP key on your keychain. 🙂